Updating DERIVA catalog annotations via the DERIVA-Workbench
The DERIVA-Workbench is a desktop application with a graphical user interface for browsing and updating DERIVA catalog annotations.
1. Initial Setup
The first time you launch deriva-workbench, the application will ask you if you
want to add a server configuration.
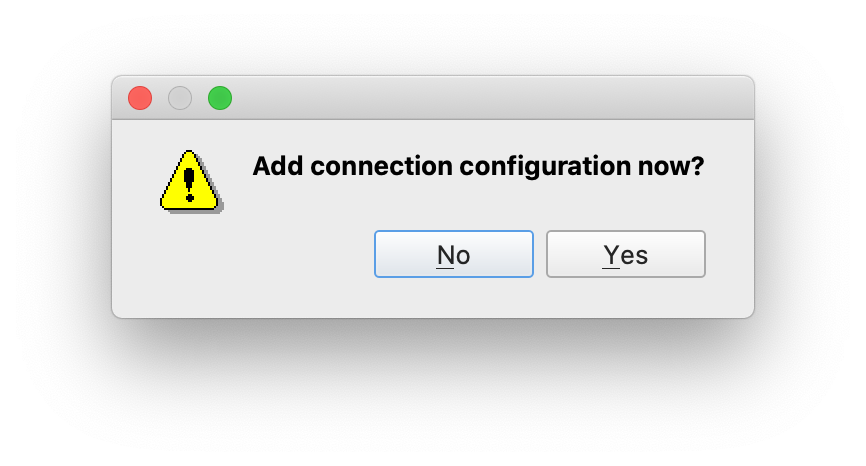
Click “yes” to bring up the “Configuration Options” dialog (you can also do this at any time by clicking the “Options” button at the top of the page).
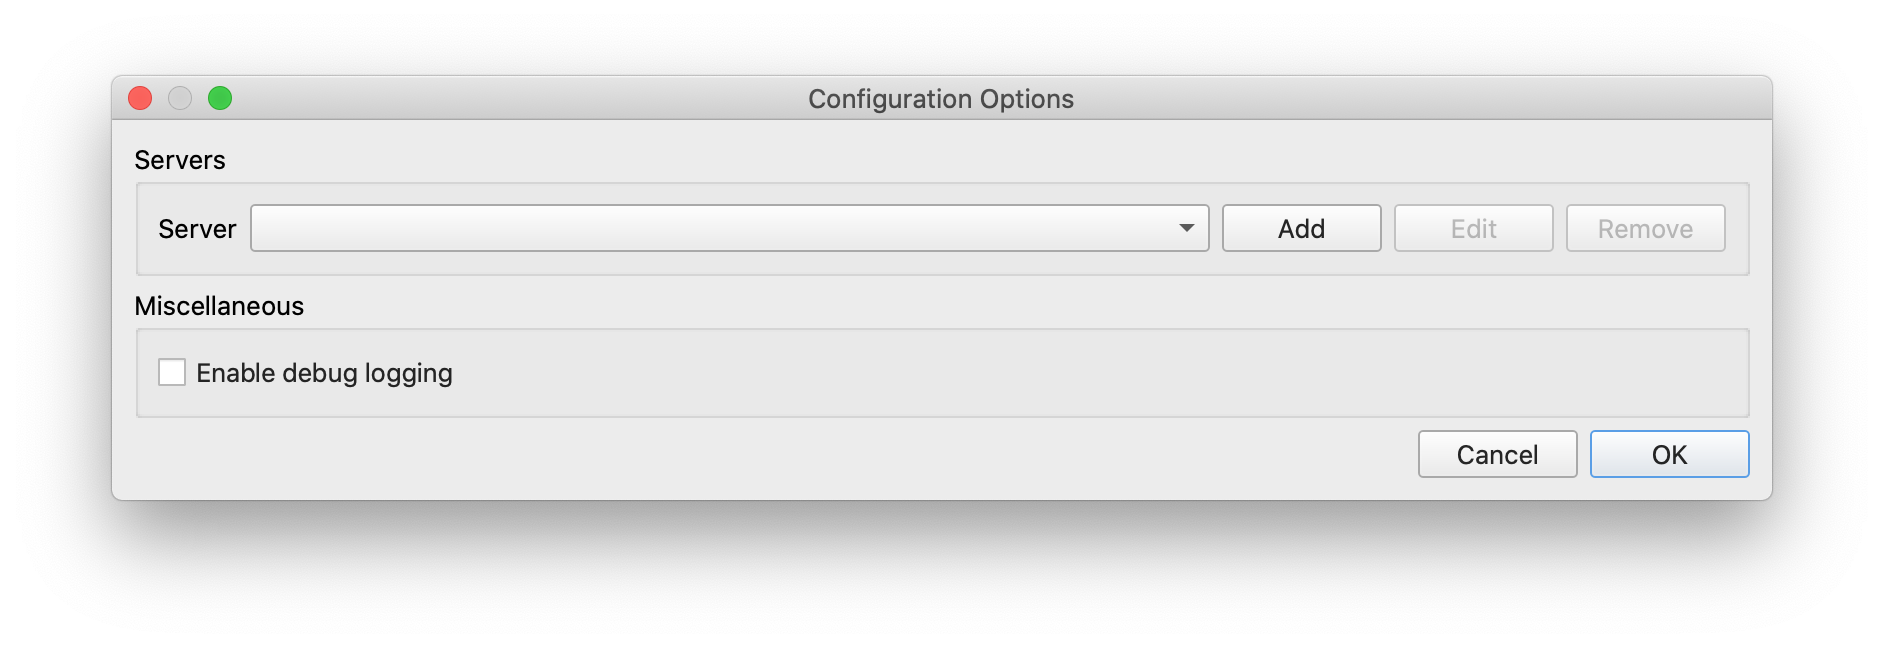
Click “Add” to bring up the “Server Configuration” form and enter the values provided by the DERIVA administrator.

Enter the host name, a memorable description, and a catalog number. Select a directory location for dumping and restoring annotations. Optionally, check the box to “Set as Default” if you want to connect to this server and catalog by default on restart of the workbench. After clicking “OK” on the Server Configuration dialog, you must click “OK” again on the Configuration Options dialog to actually connect to the server.
2. Connect and Log In
At any time, you may return to the Options in order to add a new server + catalog configuration or to change the currently selected server from the drop down.

On normal startup or after changing the server through the Options dialog, the workbench will attempt to connect to the default server. If no authentication credential is available, you must login.
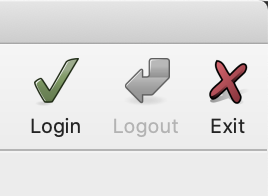
The login sequence will follow the usual flow that you experience through the DERIVA web application (e.g., Chaise) and other DERIVA desktop applications. You may also use the workbench in combination with the DERIVA-Authentication agent to maintain a persistent user credential to skip the login step in the DERIVA-Workbench.
3. Browsing a Schema
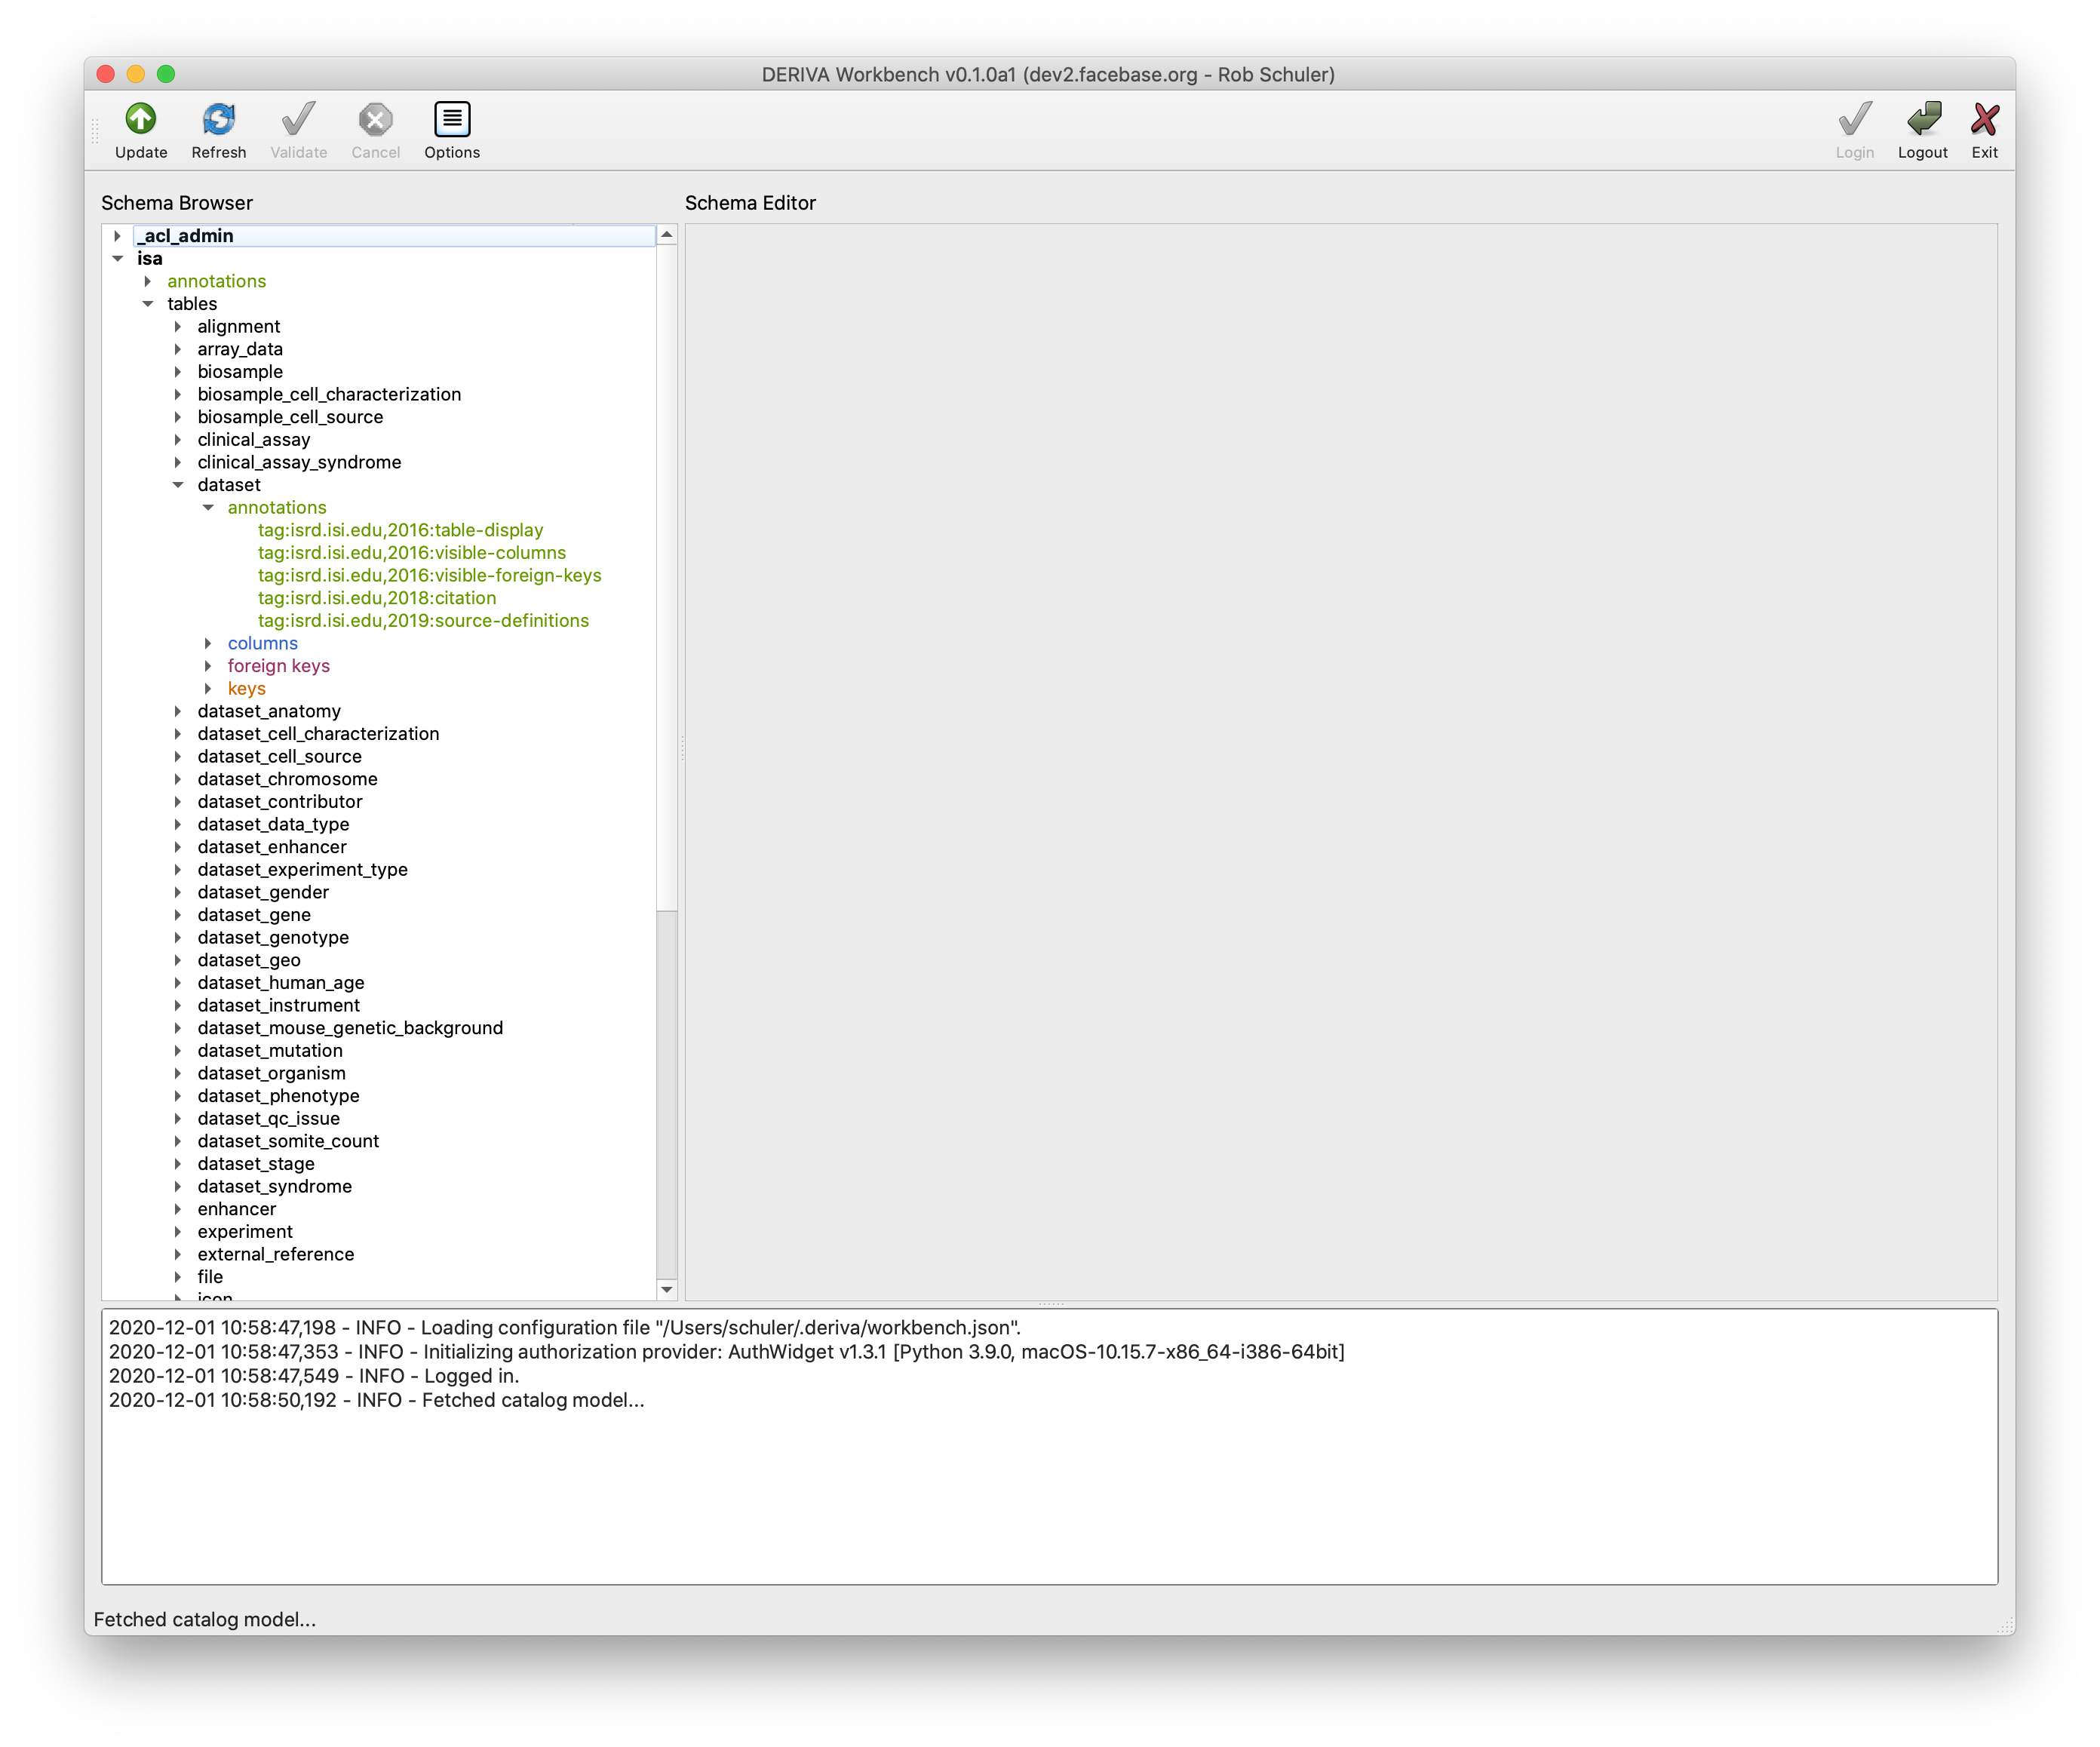
When connected and authenticated to a server, the left panel of the application will display a tree view of the catalog schema.

You may then navigate through the model by expanding each model element either by double-clicking on the label or on the chevron icon to the left of the label.
4. Editing Annotations (Text-based)
Any annotation in the schema may be edited using an integrated JSON text editor. Double-clicking on the “annotations” label will open the JSON text editor with the full annotations document for the selected model object.
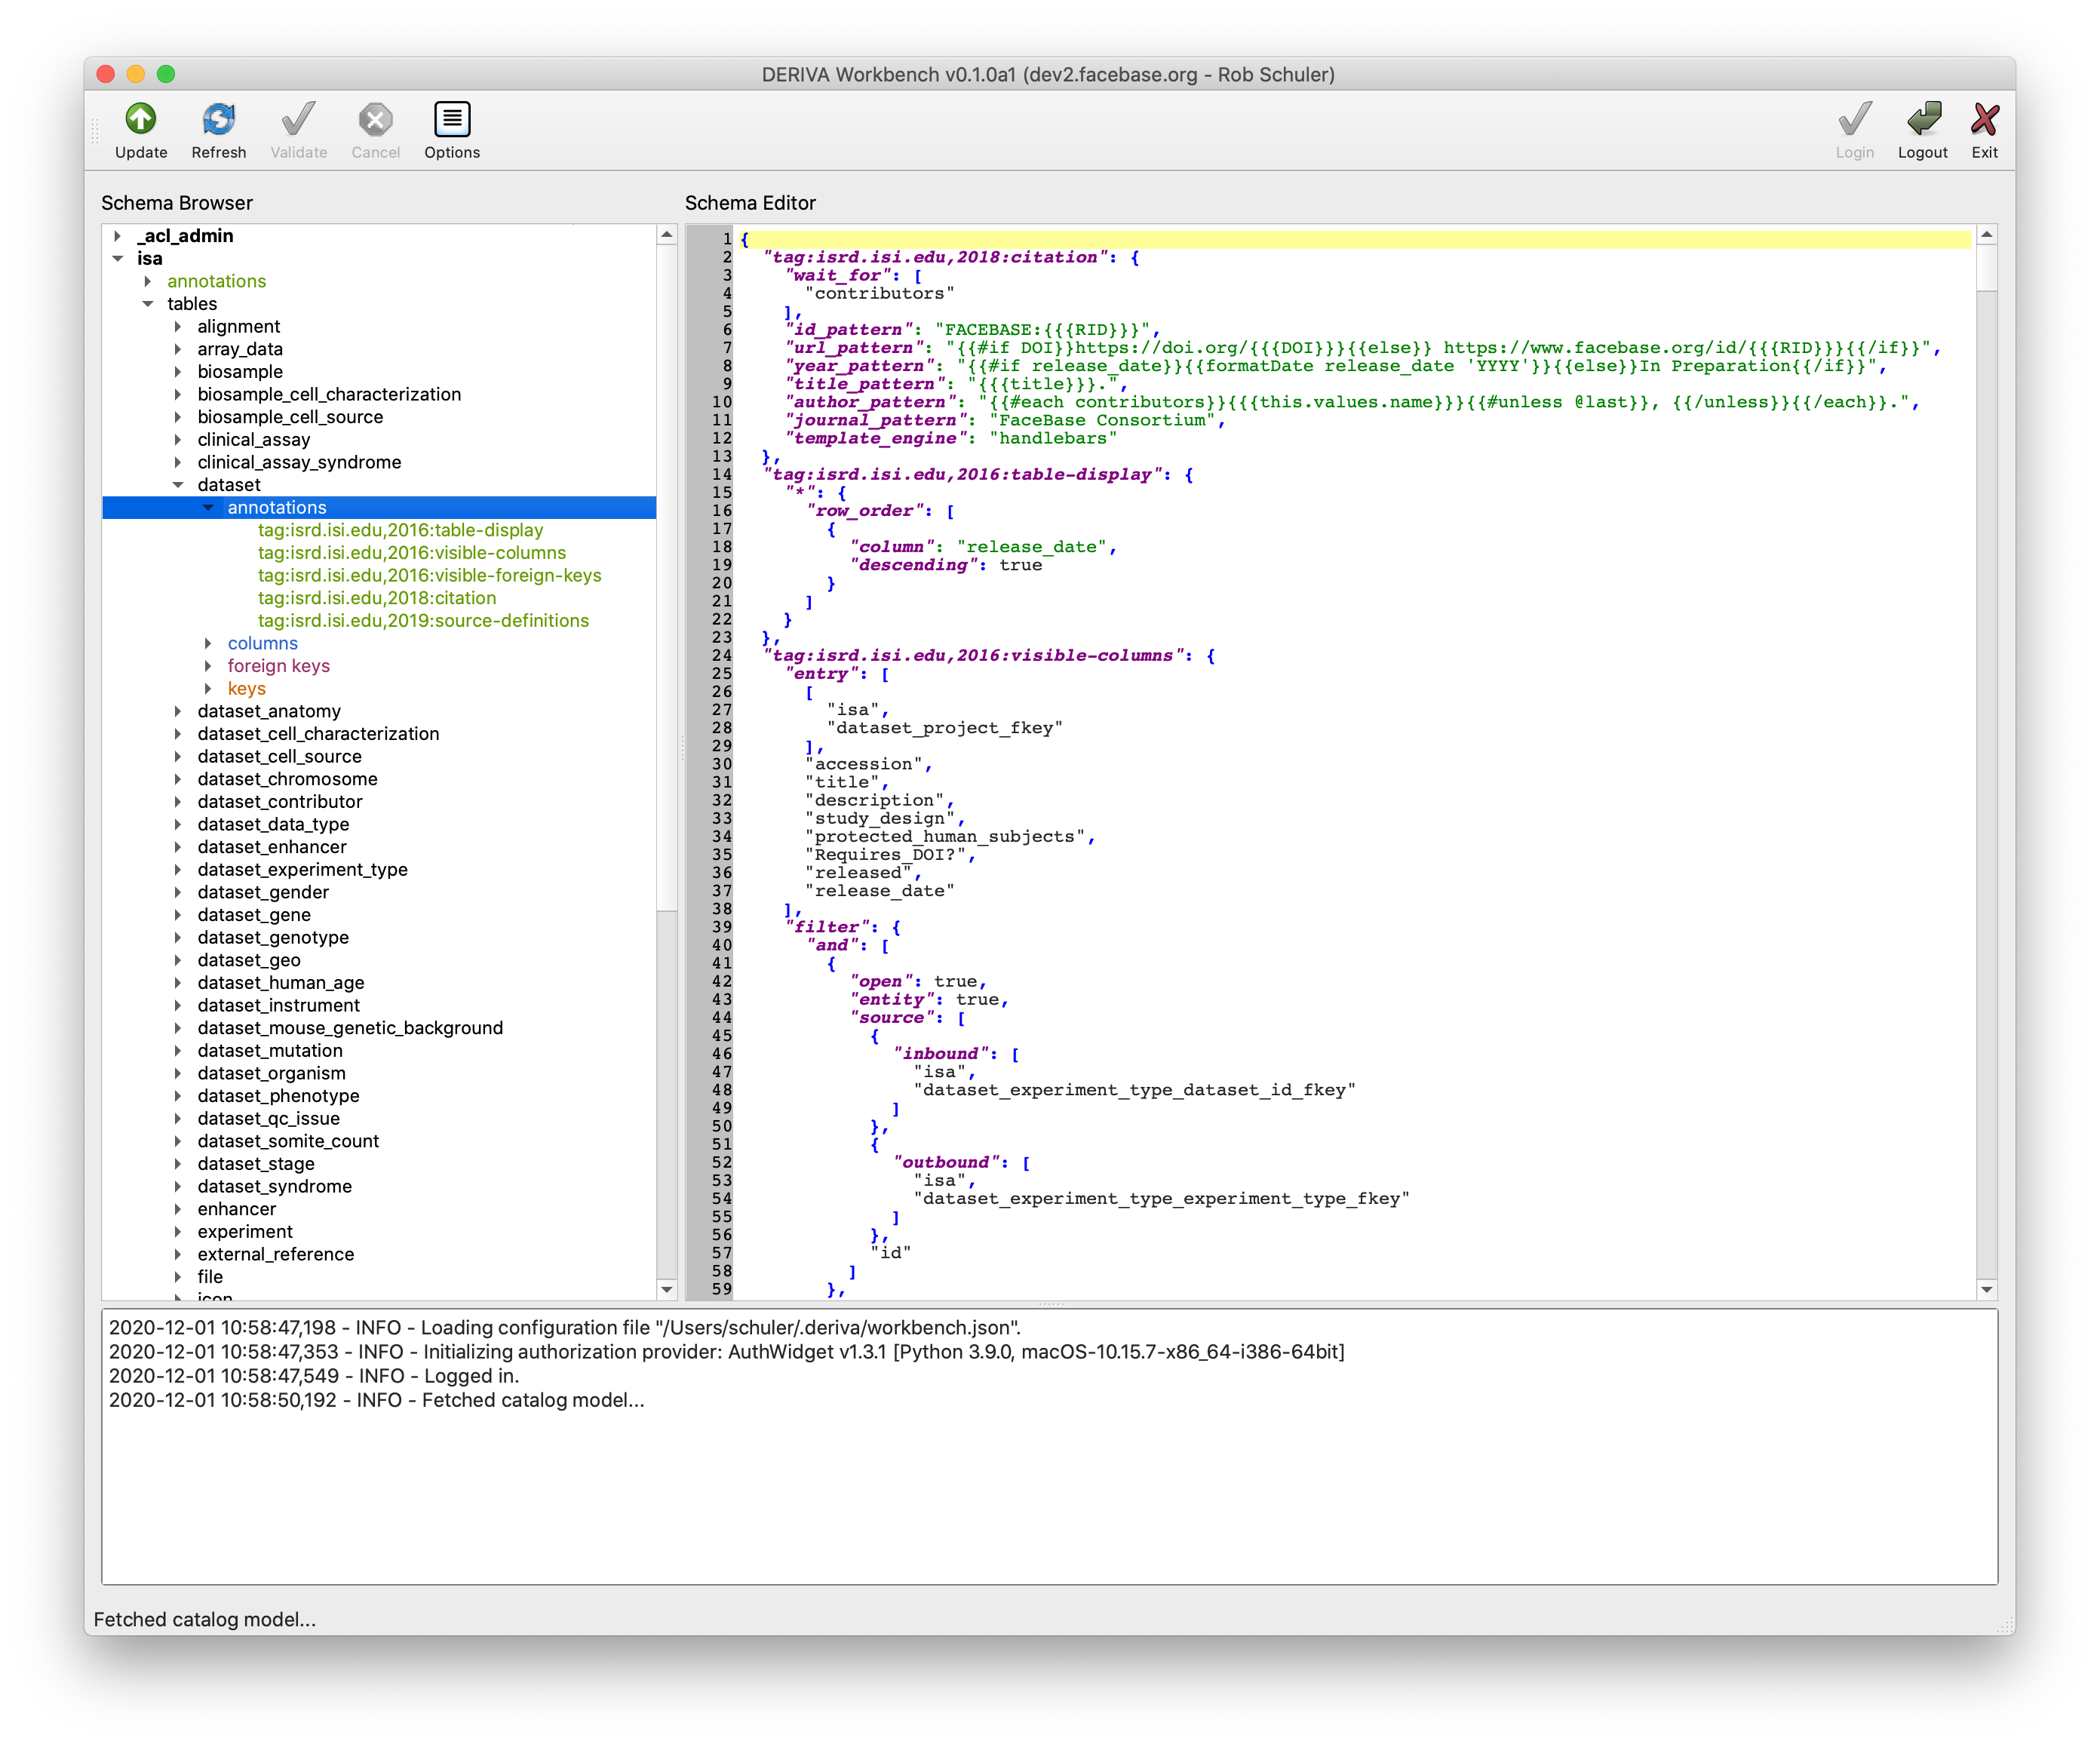
At present, malformed JSON will simply be ignored. The editor will only change the underlying annotation if the text entered can be parsed without errors. While editing, the annotations document you may add an annotation by adding the appropriate key and body or remove an annotation by removing its key and body from the document.
5. Editing Annotations (Graphically)
The workbench currently provides enhanced support for several key annotations, including
visible-columns, visible-foreign-keys, source-definitions, table-display,
citation, display, foreign-key, asset, key-display, and column-display. For
all other annotations, the workbench will fall back to the JSON editor.
a. Editing visible-columns
You will find a tab for each known context in the annotation. Each tab contains a table
of the configured columns. The X next to the context name in the tab allows you to delete
the context, but you will be asked for confirmation before it proceeds. In order to create
a new context, switch to the <create> tab, enter a unique name, and click Add.
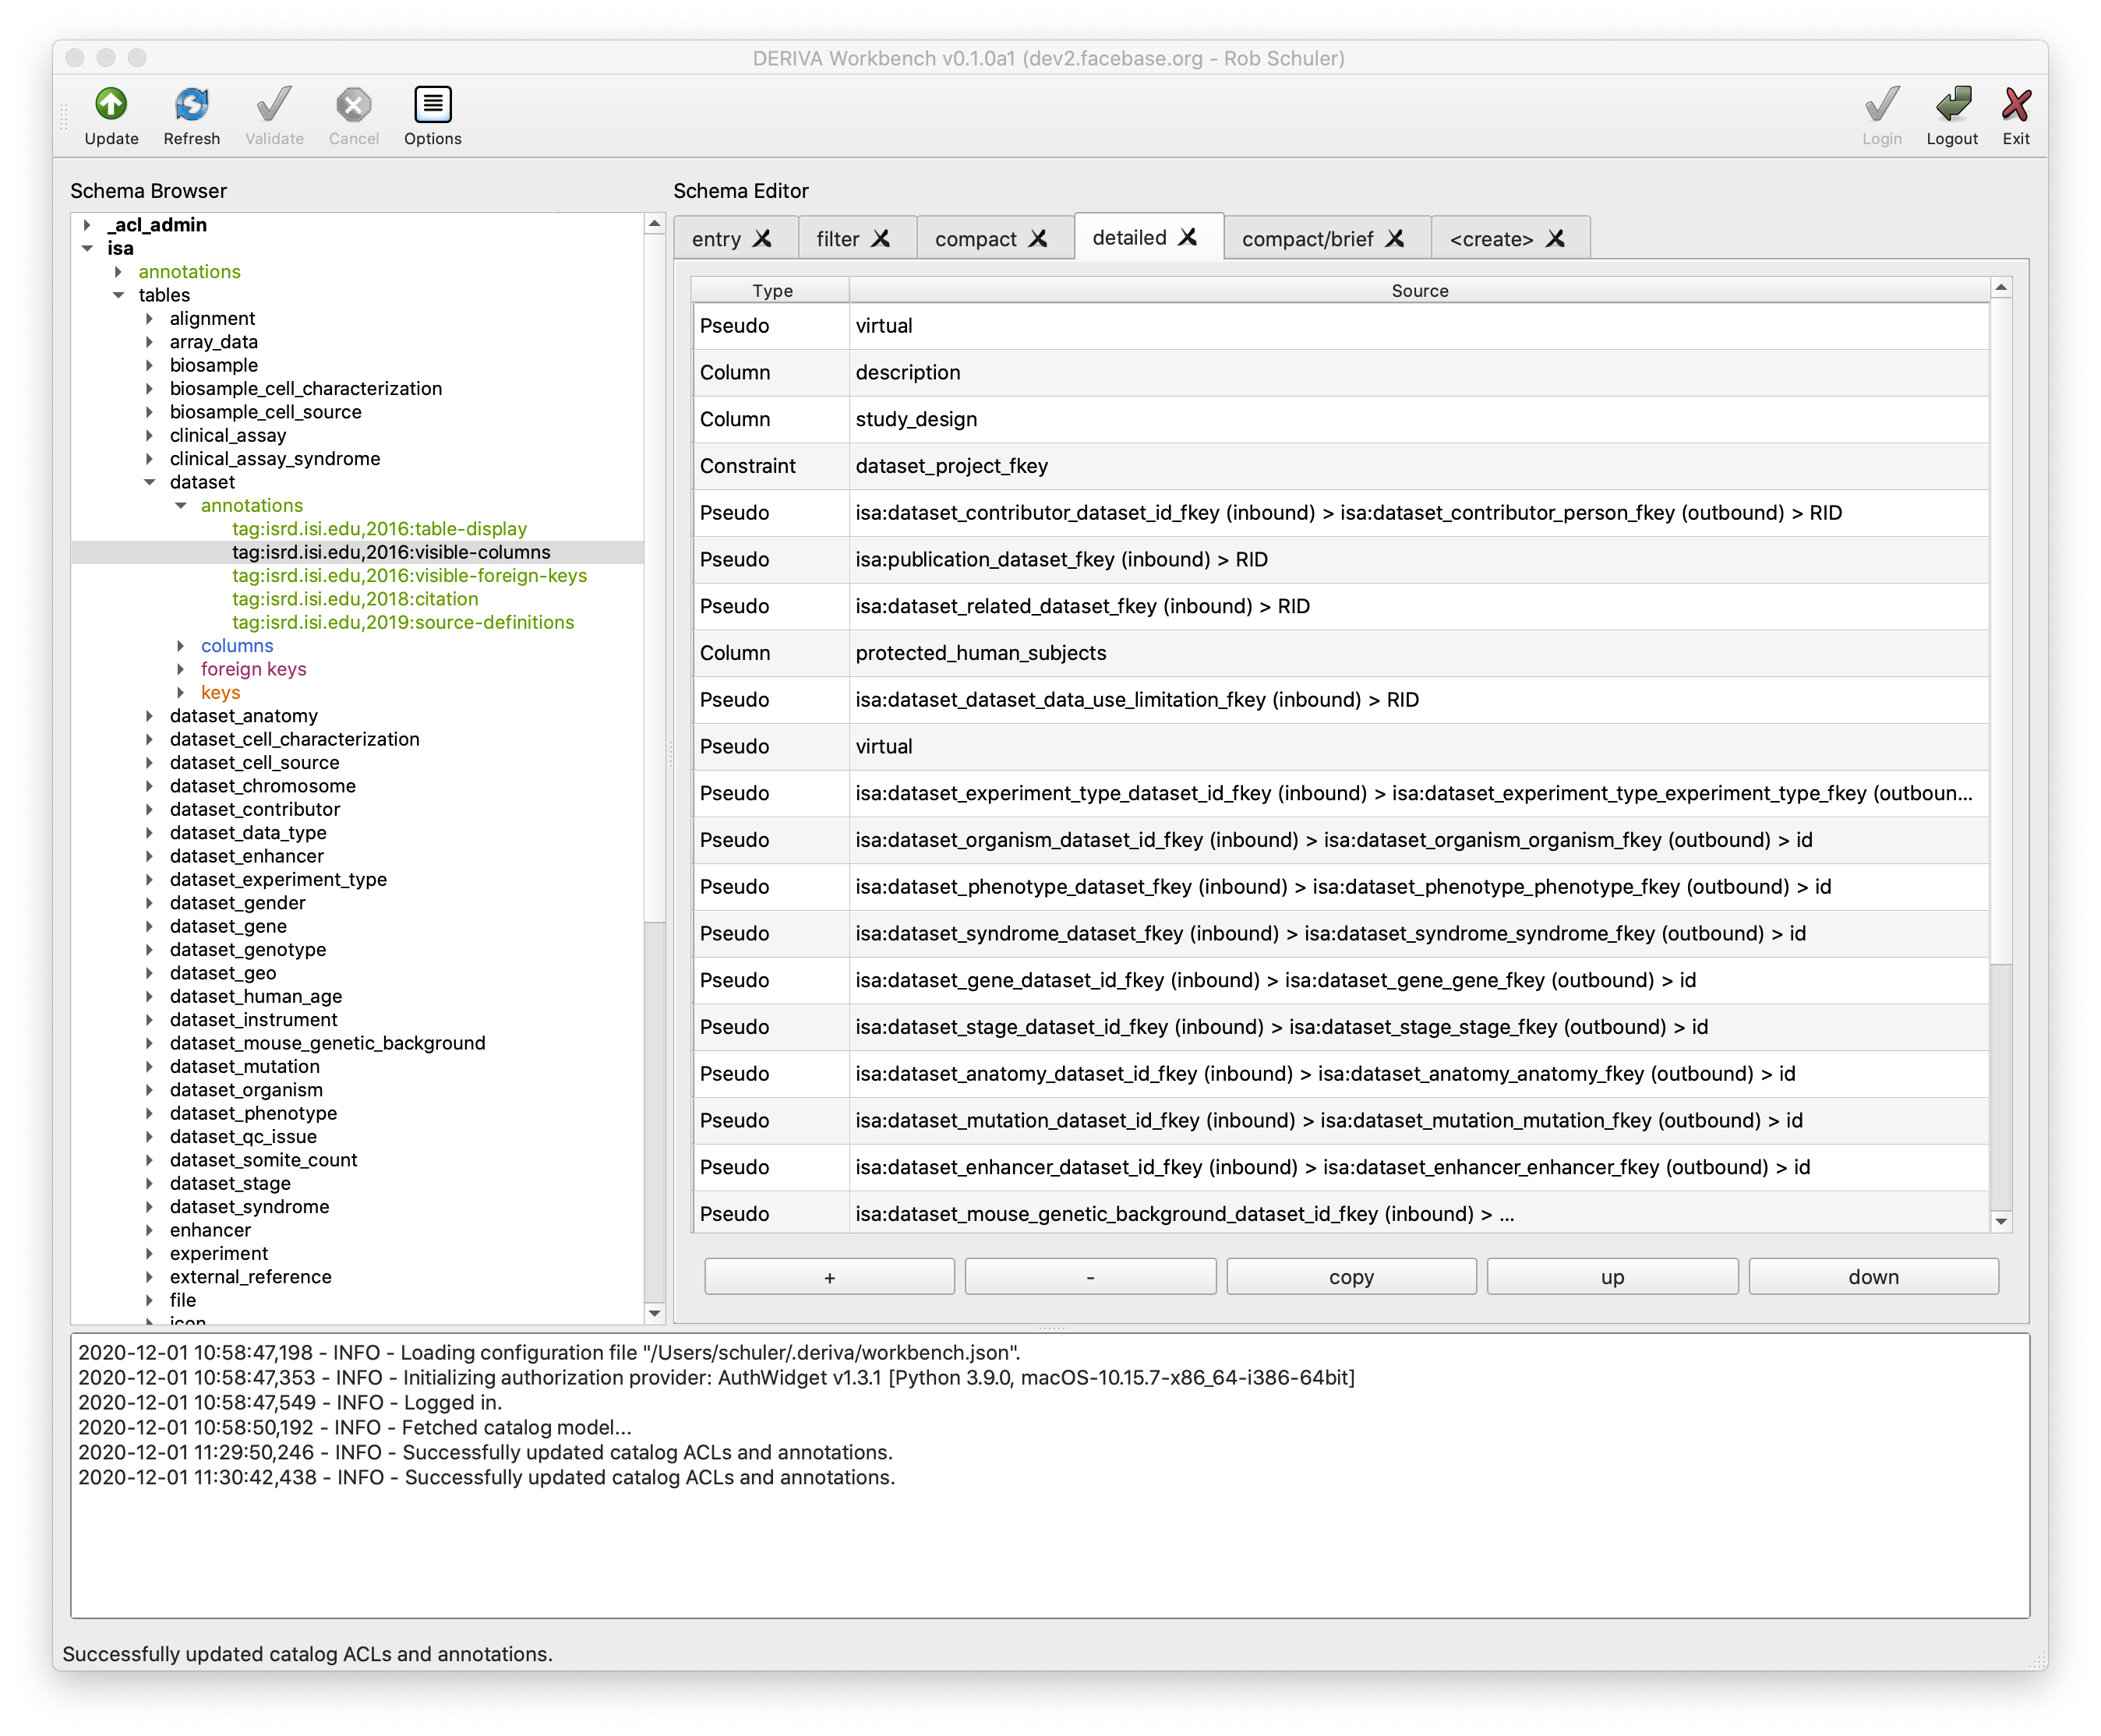
Click on a row in the table, and use the - button to remove the visible column, use the
up button to move it up in the order, down to move it down in the order, or use copy
to make a duplicate of the visible column.
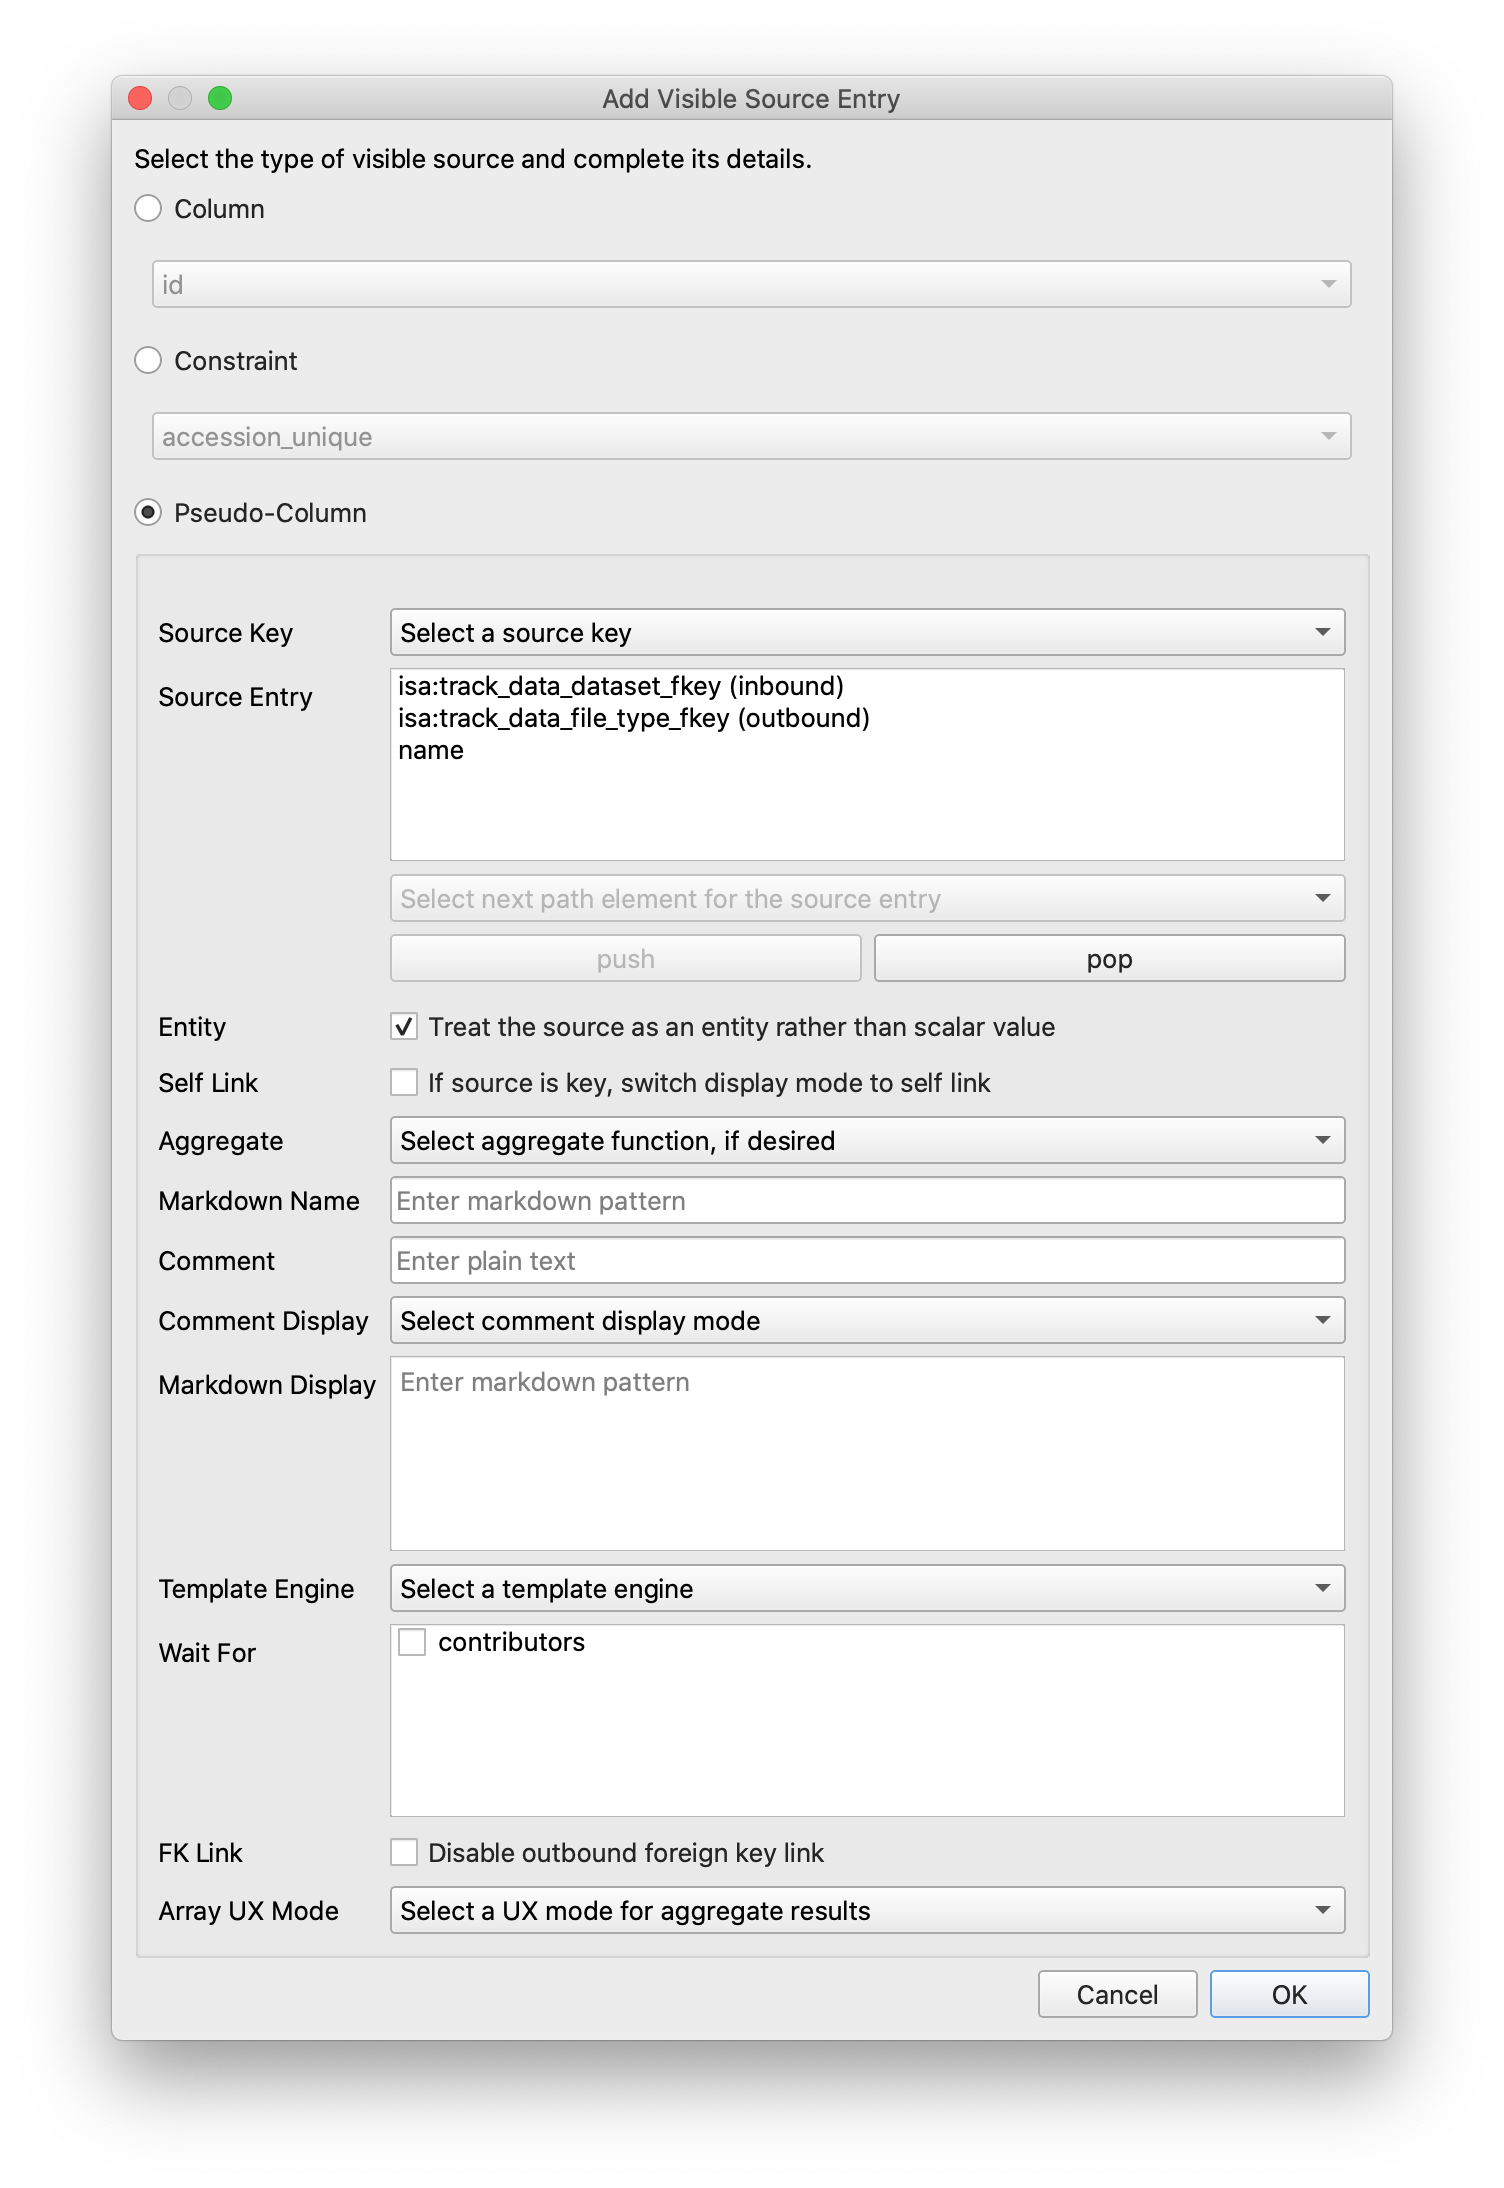
To add a visible column click the + button beneath the table of visible columns. This will
open the “Add Visible Source Entry” dialog. From this dialog you may select the type of
visible column from Column, Constraint, or Pseudo-Column. The values for the Constraint type
entries include primary keys and outbound foreign keys for the containing table for the
annotation. Shown in the dialog is a hypothetical visible column based on a source entry that
follows a foreign key path and terminates in a column name.
To edit a visible column, double click on a row in the table and the “Edit Visible Source” dialog will be opened.
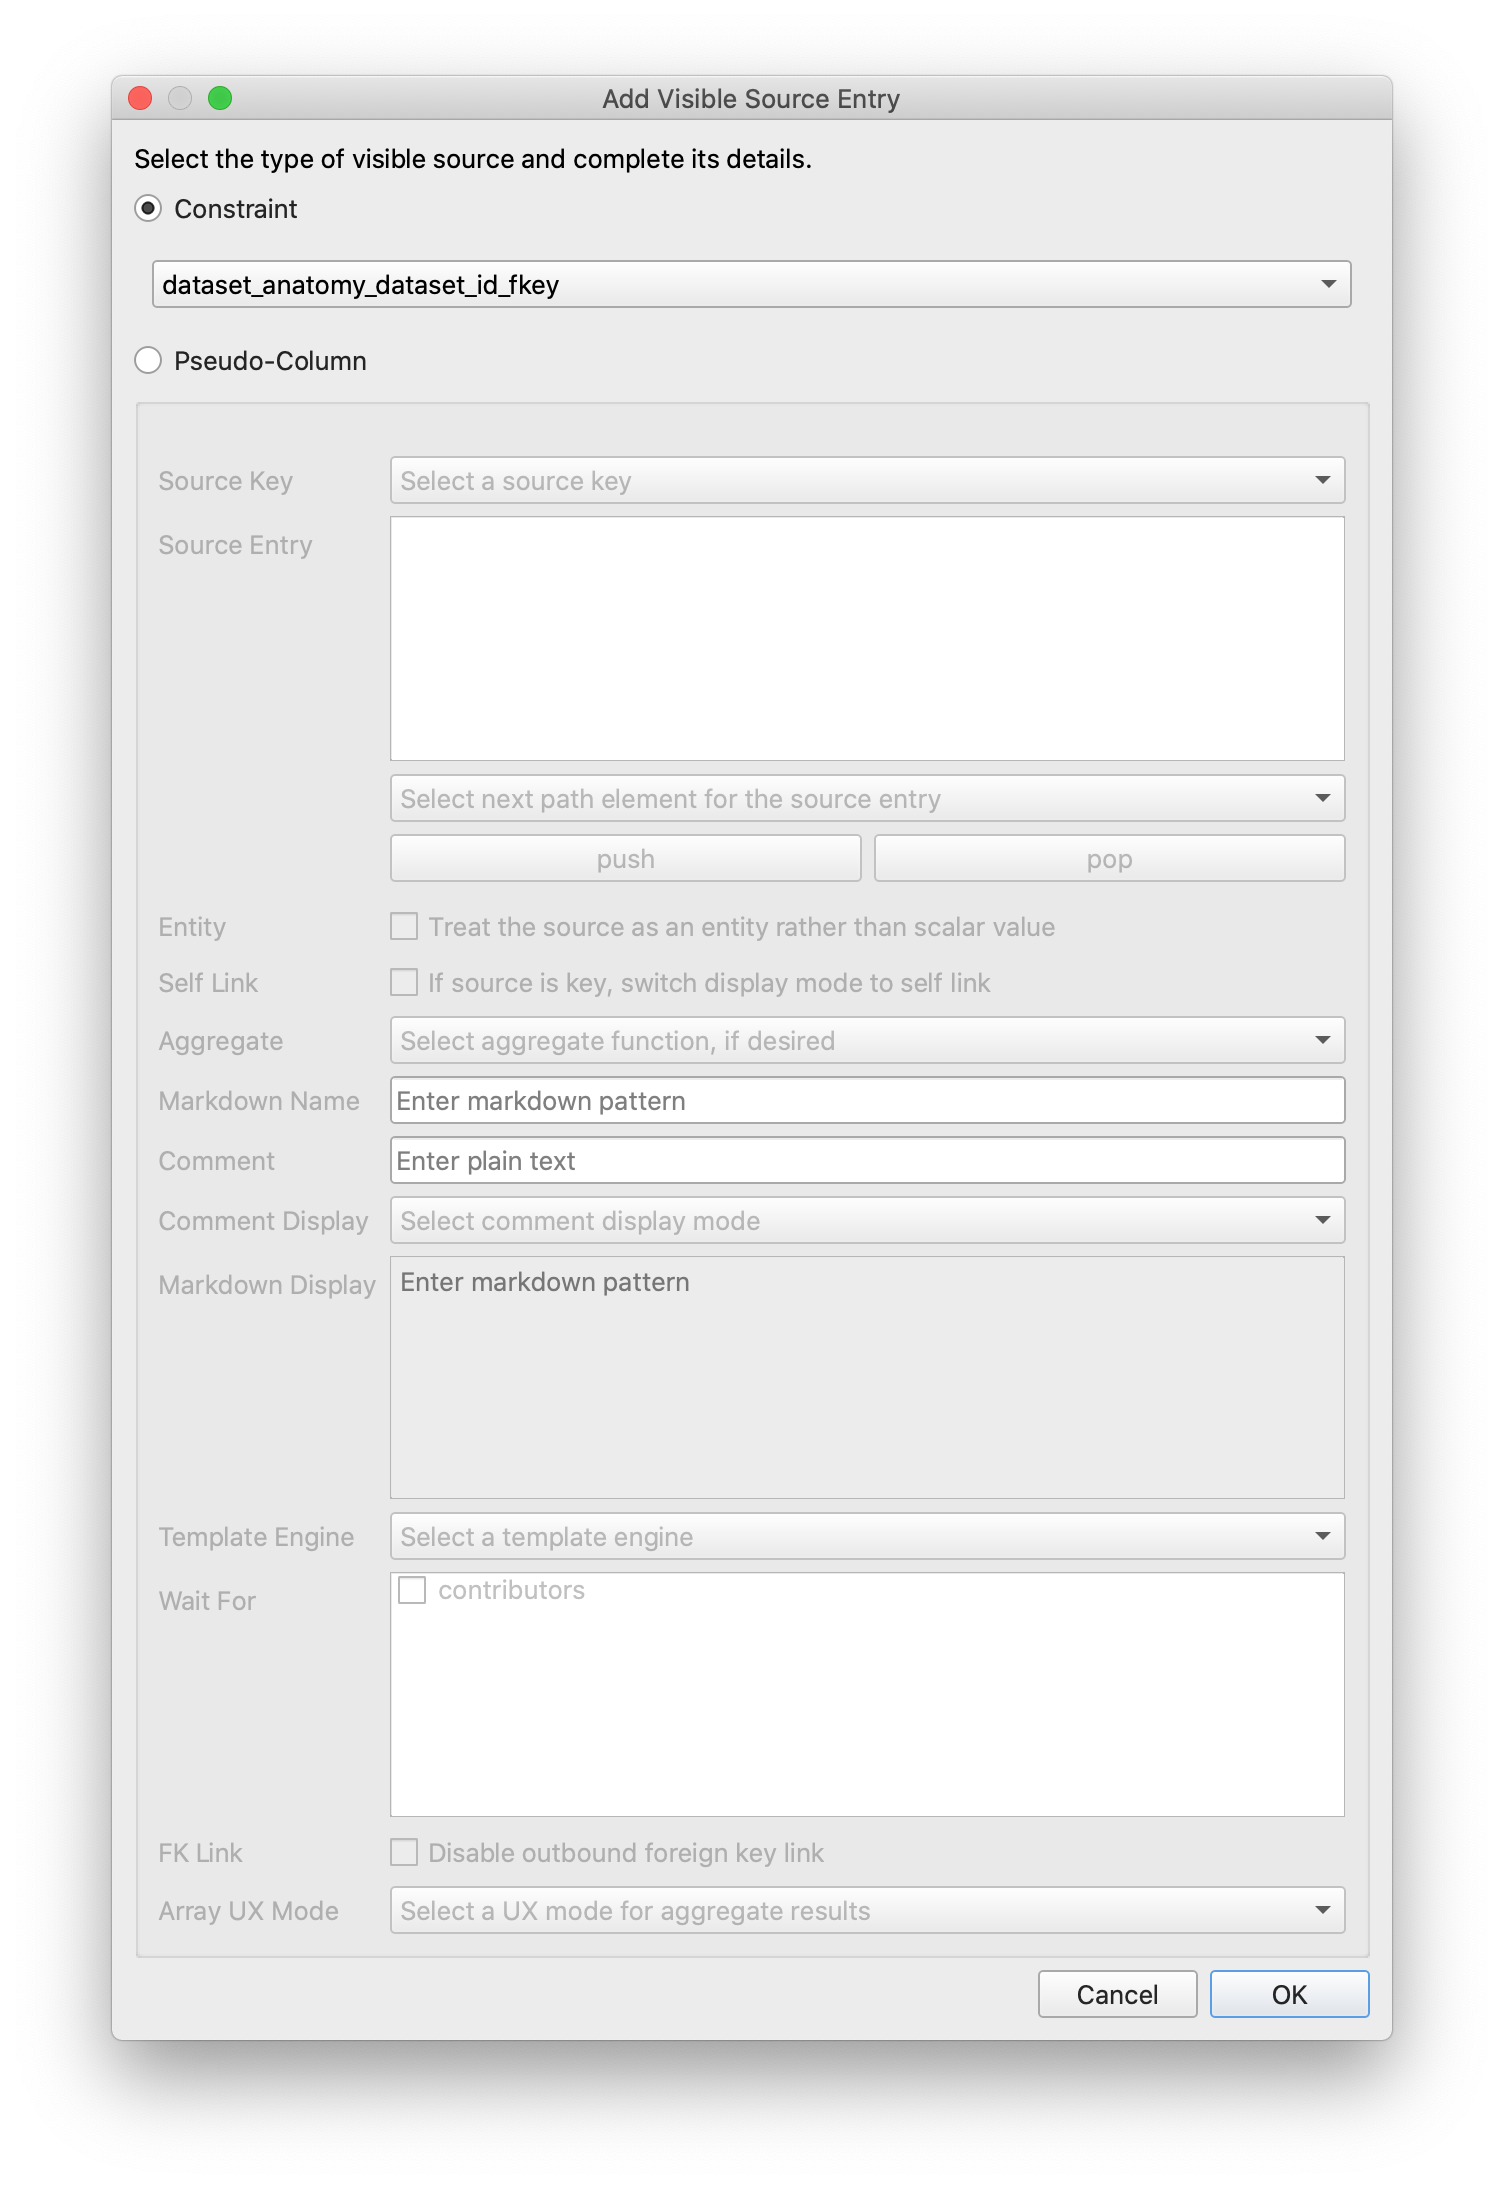
b. Editing visible-foreign-keys
The primary difference from visible-columns is that visible-foreign-keys entries (a) do
not allow Column type entries, and (b) the Constraint type entries are of inbound foreign
keys to the present table.
c. Editing source-definitions
The source-definitions editor allows you to define new “sources” that can be used by referencing
their respective source key in other annotations like visible-columns or in templating
environments used in various other annotations such as citation.
You may add All or a select subset of columns (Columns) or foreign keys (FKeys) to be made
available in templating environments, along with the sources (Sources).
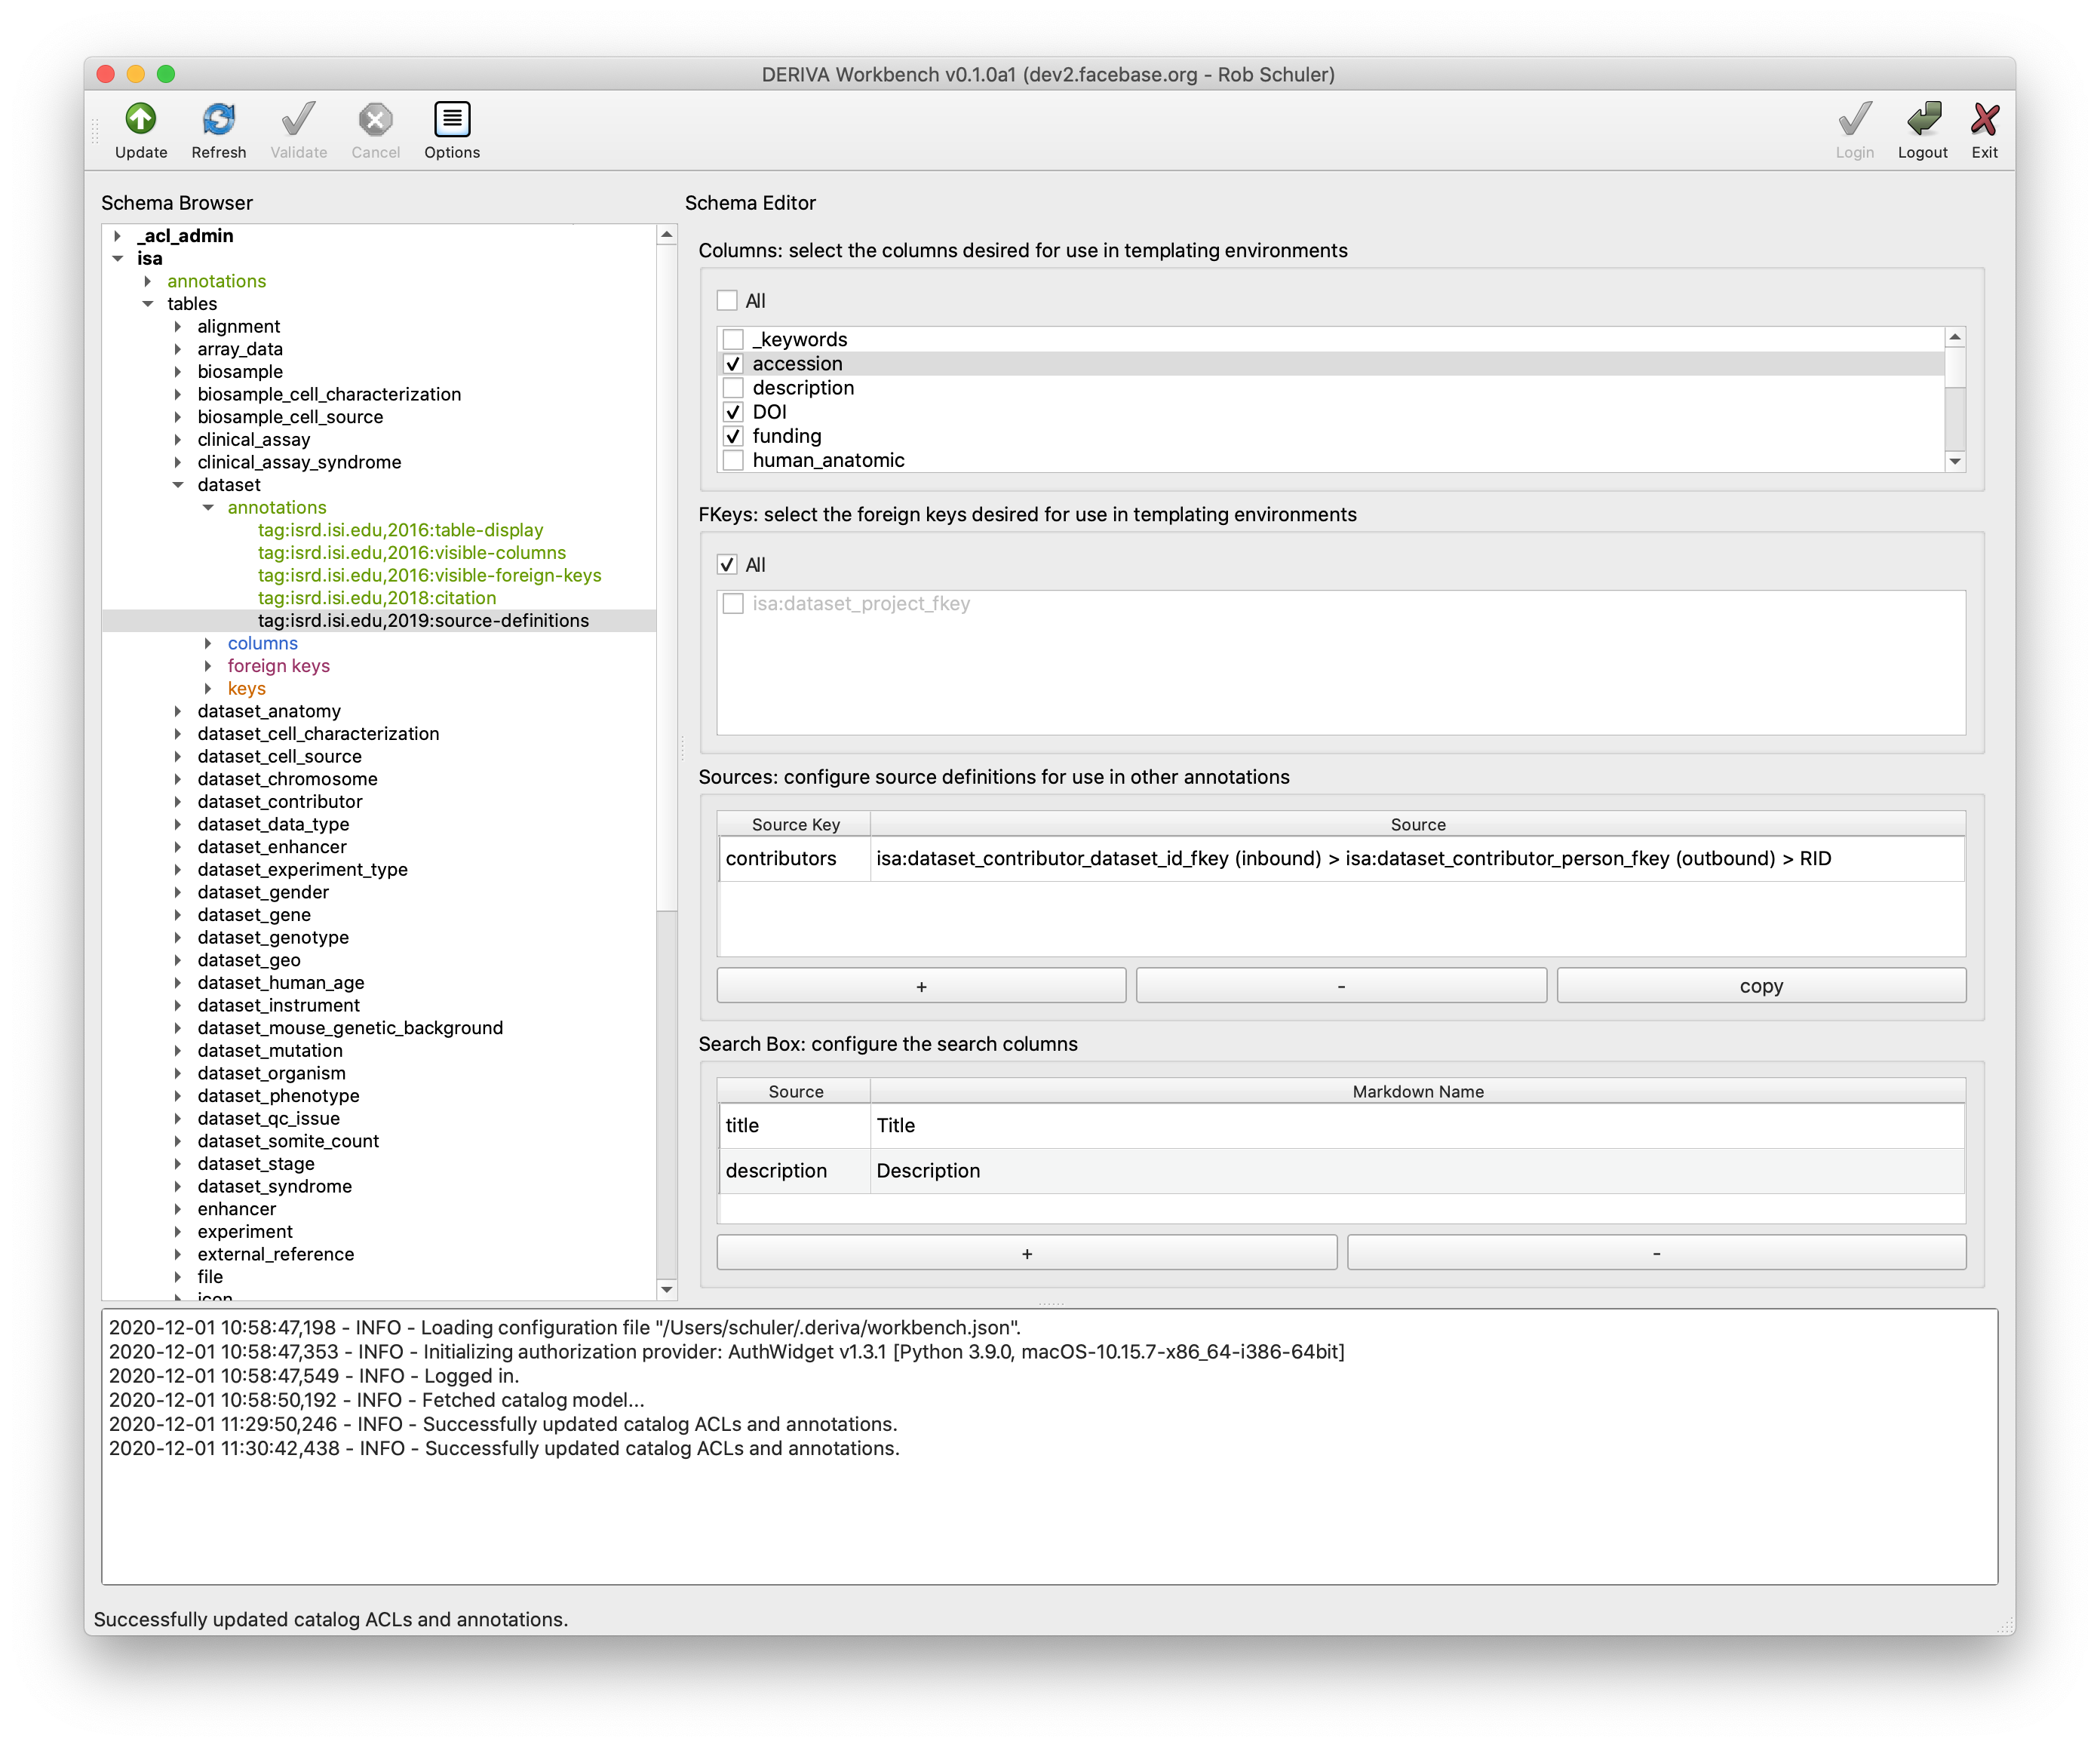
In the middle “Sources” section, you may define new sources. The Source Definition dialog differs
subtly from the add/edit visible sources dialog. A source definition requires that you enter a
unique Source Key. Sources may be added (+), removed (-), and duplicated (copy) with the
respective buttons below the Sources table.
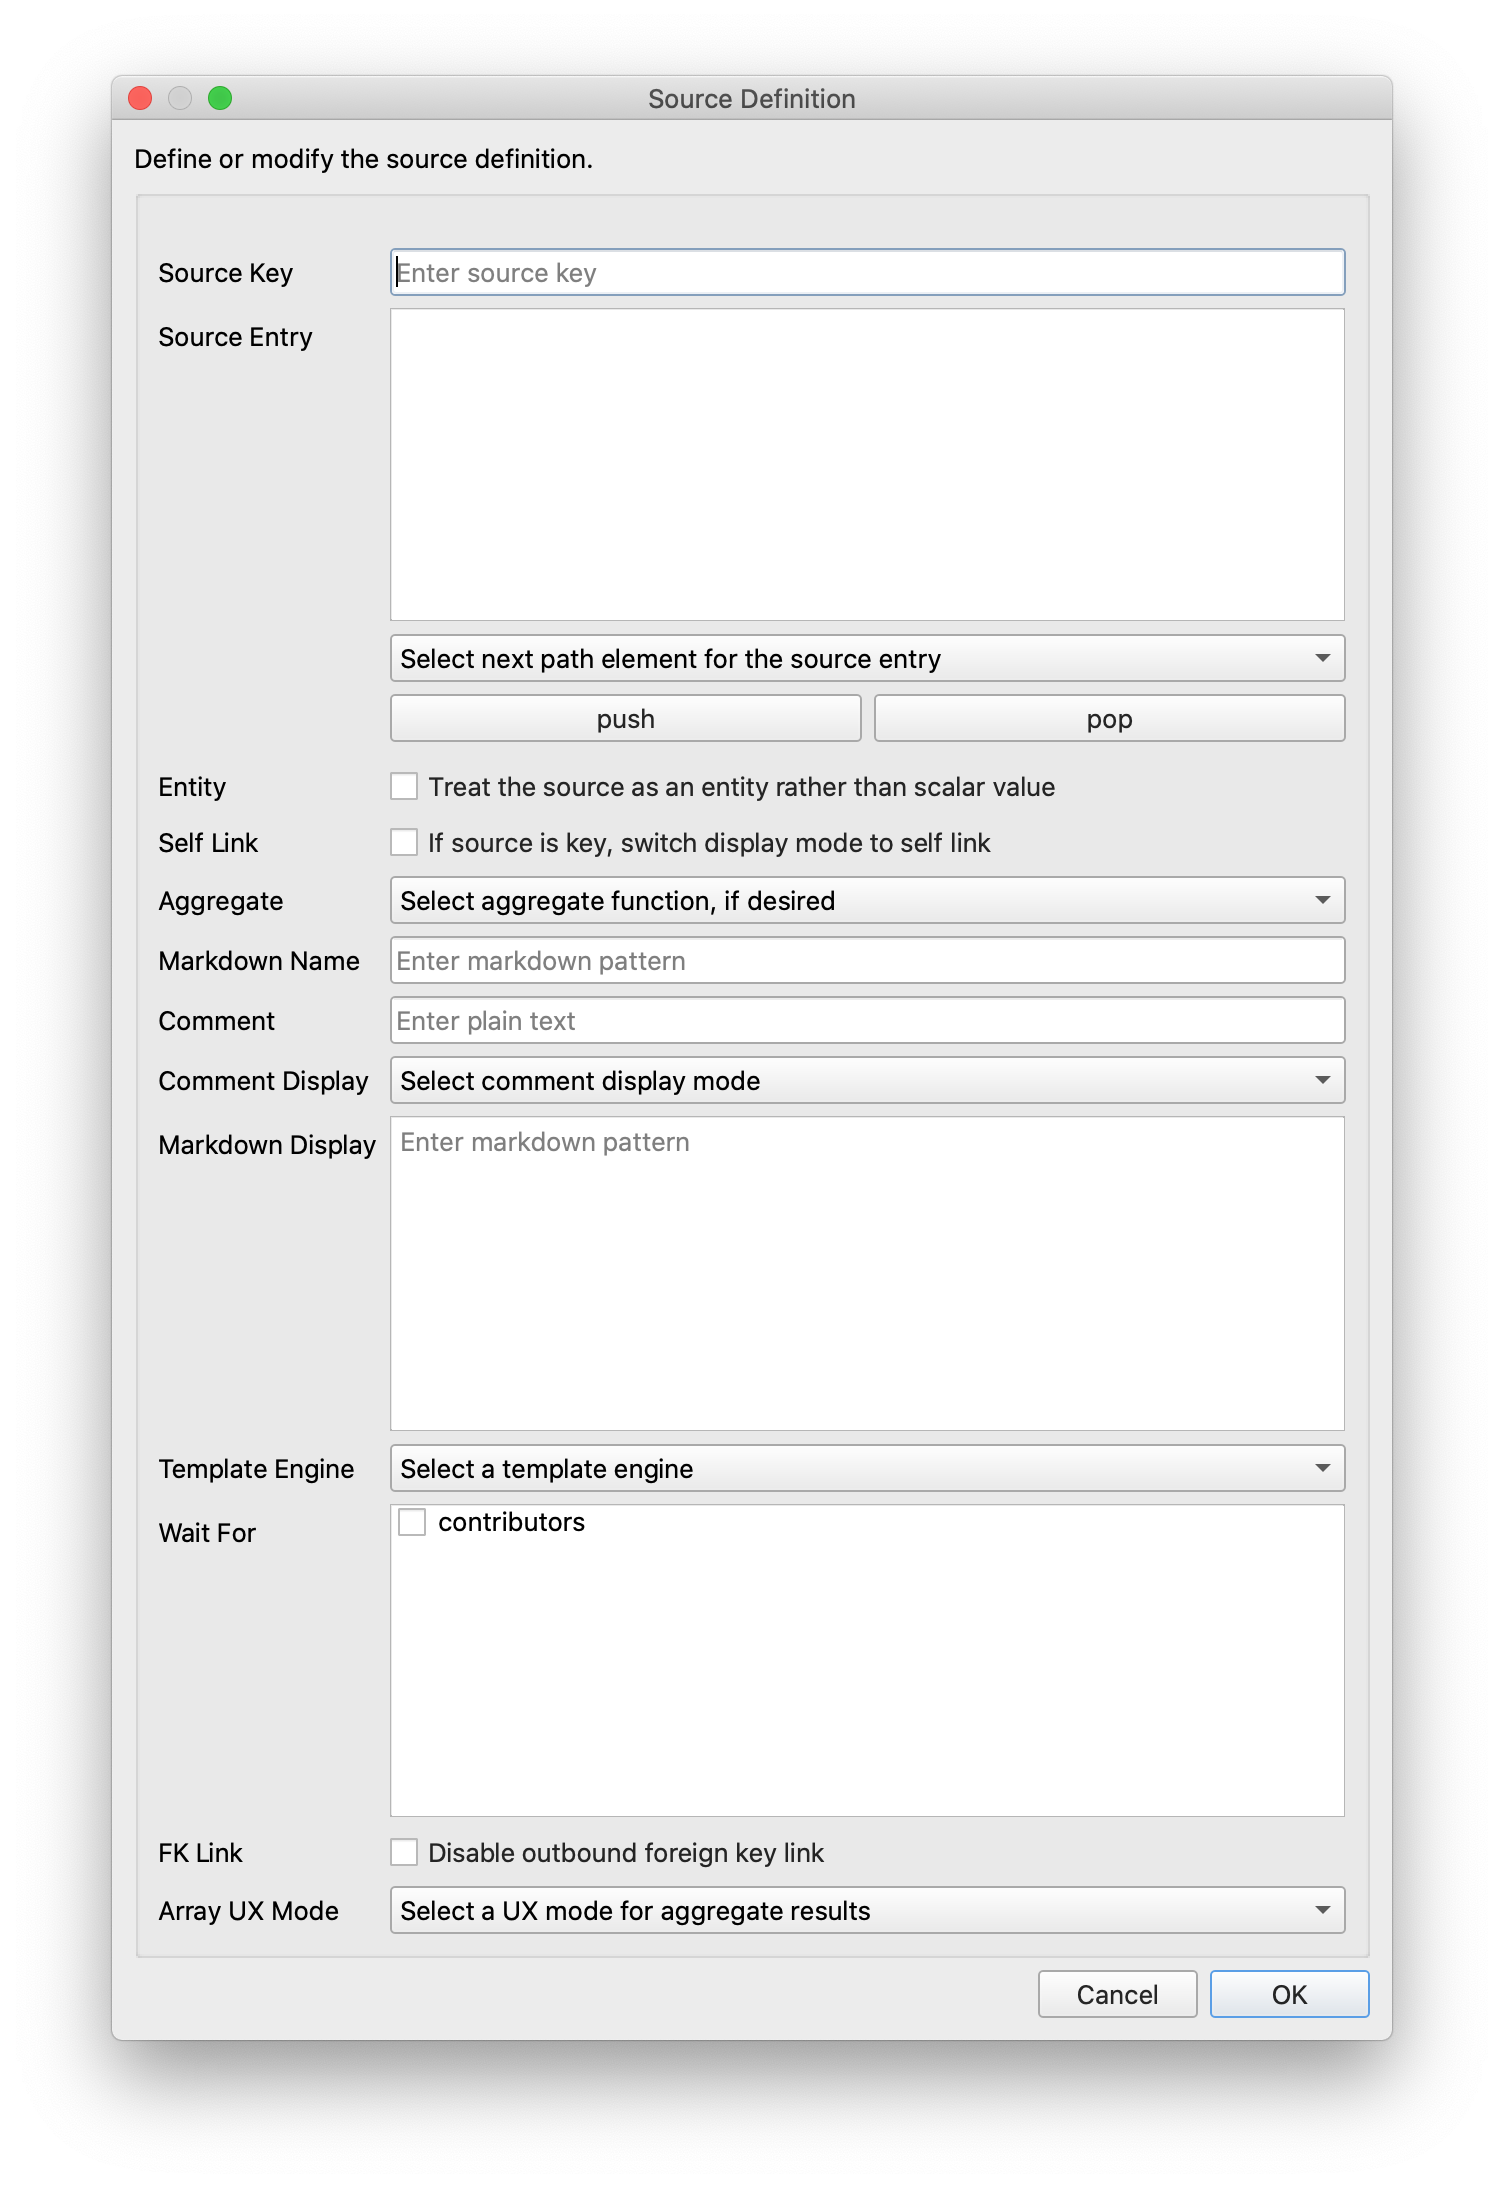
(Note: some of the fields in the dialog are not useful for defining a new source and will be removed in subsequent development previews.)
Finally, the special search-box source may be defined by adding columns. The search columns
may be added (+) or (-) removed using the respecitve buttons below the Search Box table.
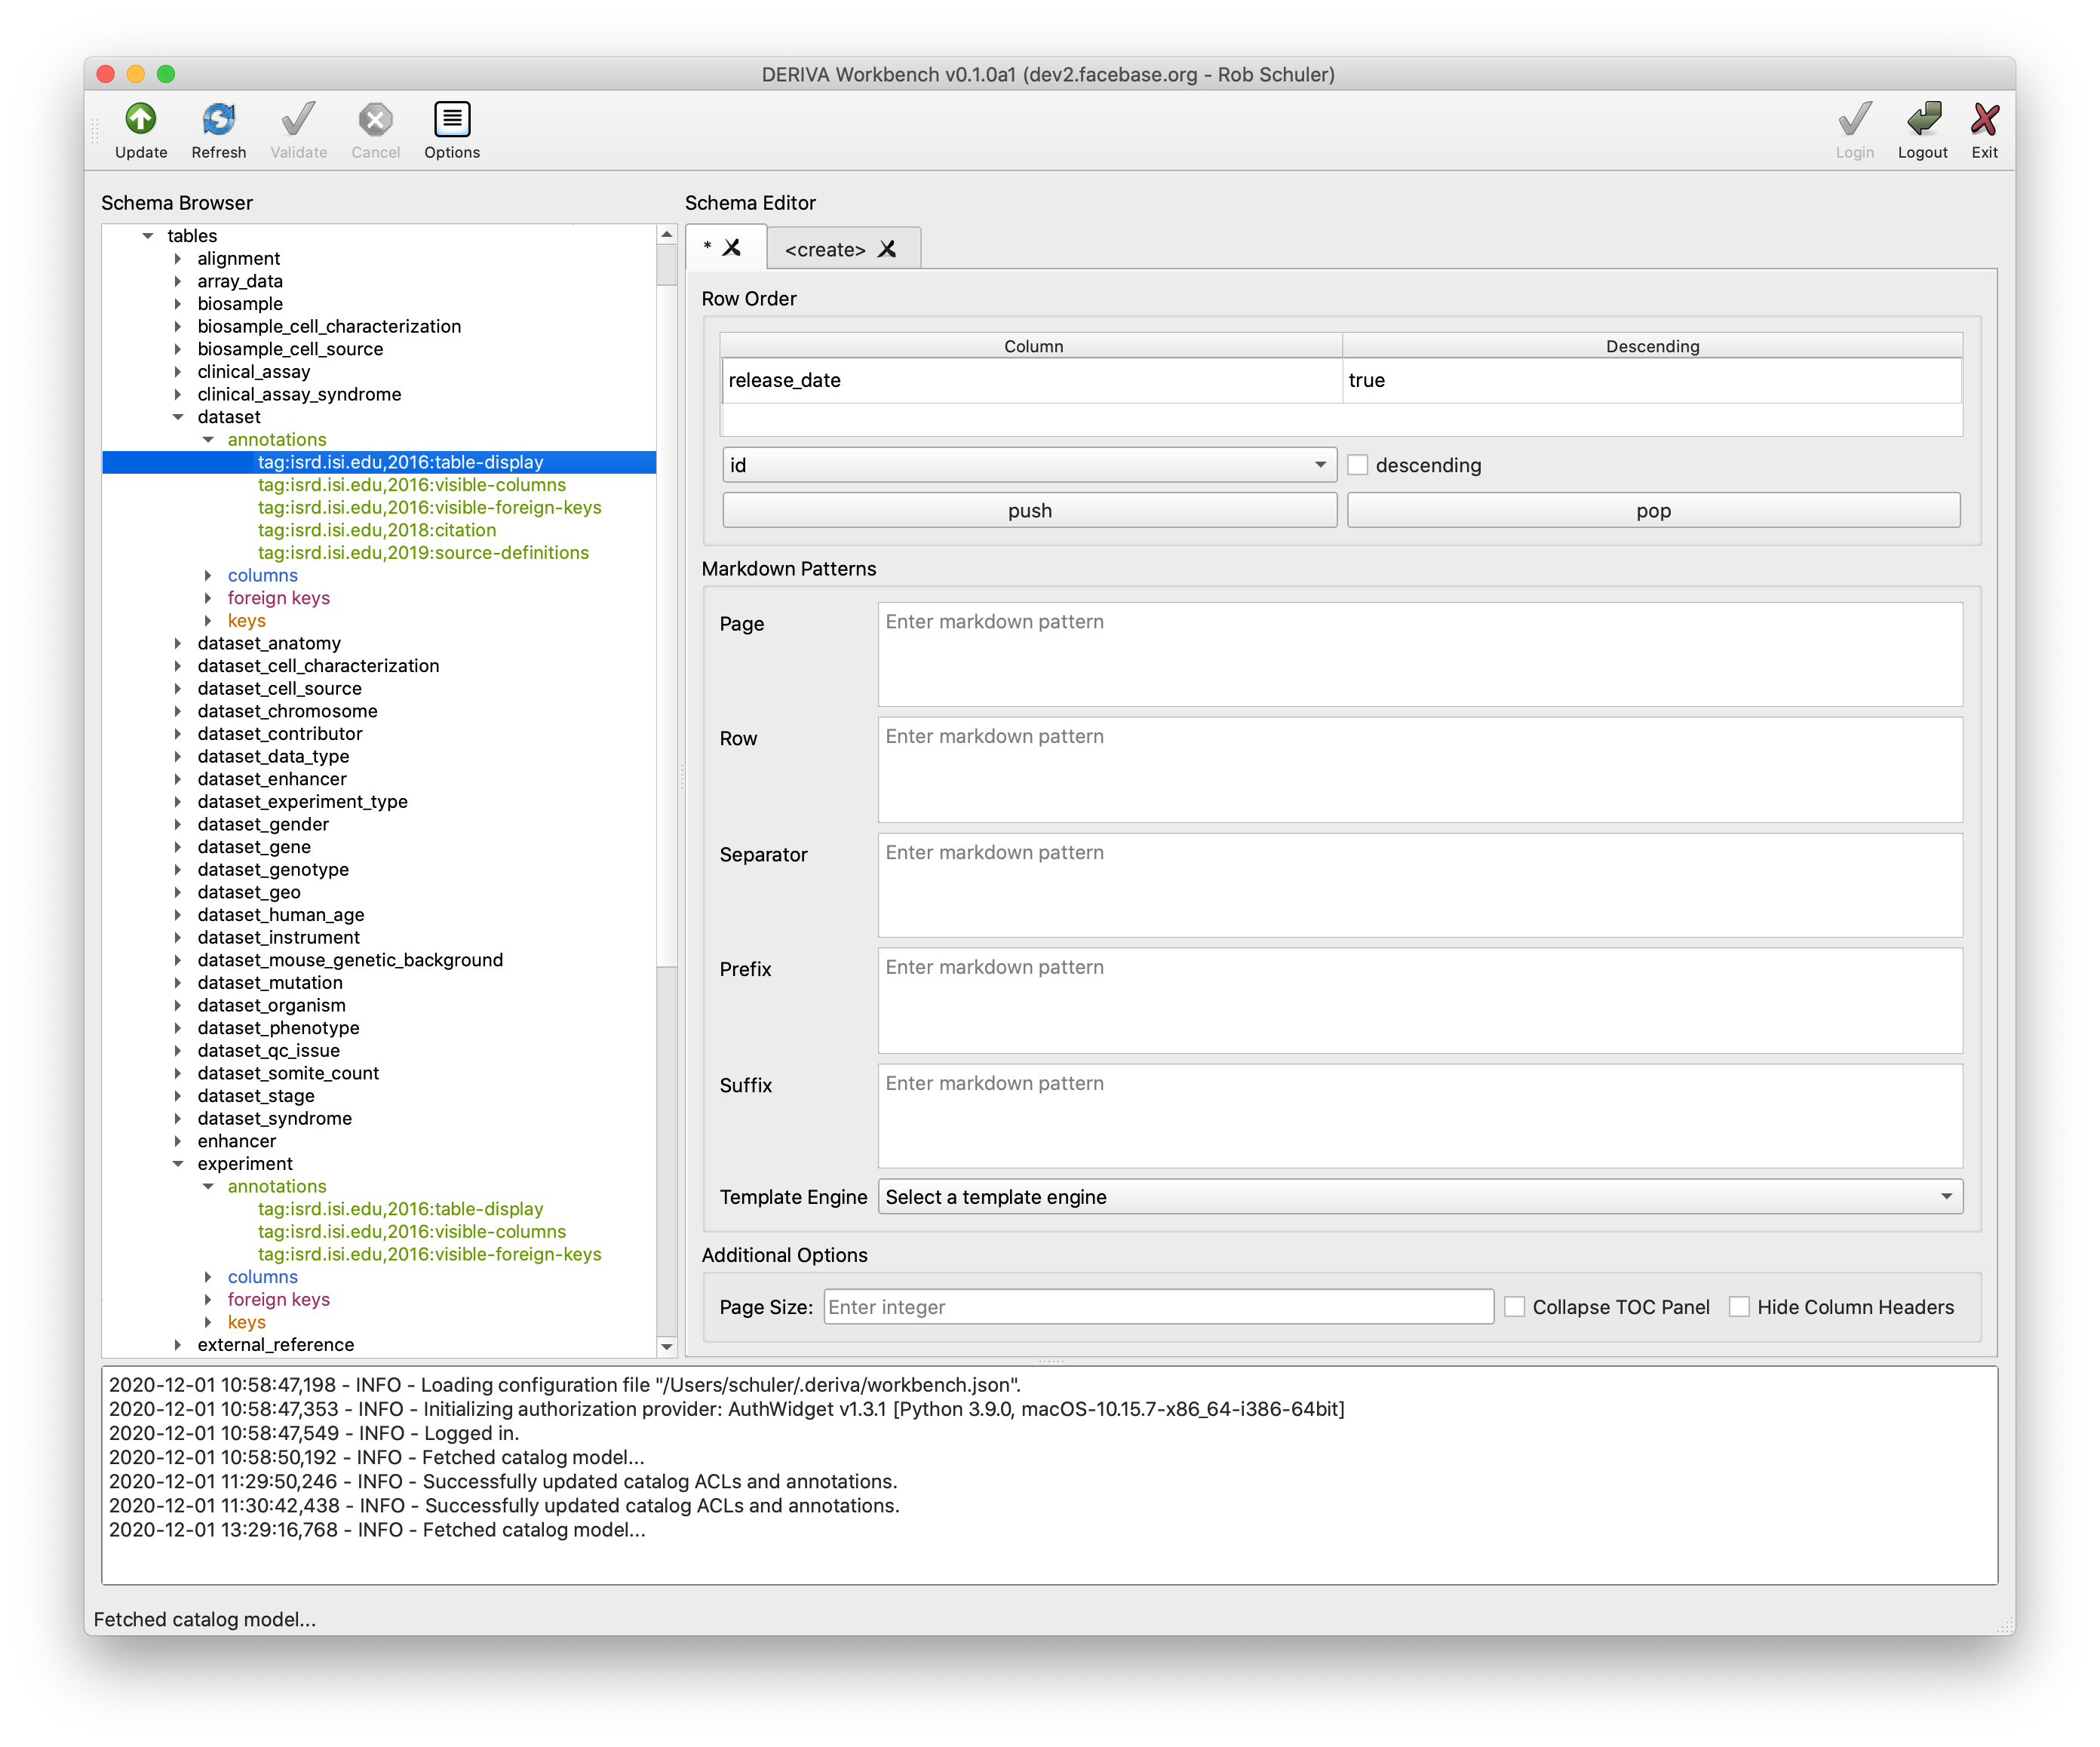
d. Editing table-display
The table-display annotation makes use of display contexts like the visible- sources
annotations. Each context allows definition of its Row Order as an ordered sequence of
columns with optional ‘descending’ modifier. The Markdown Patterns may be Page or some
combination of Row, row Separator, Prefix, and Suffix. For a complete description, see
the annotation guide.
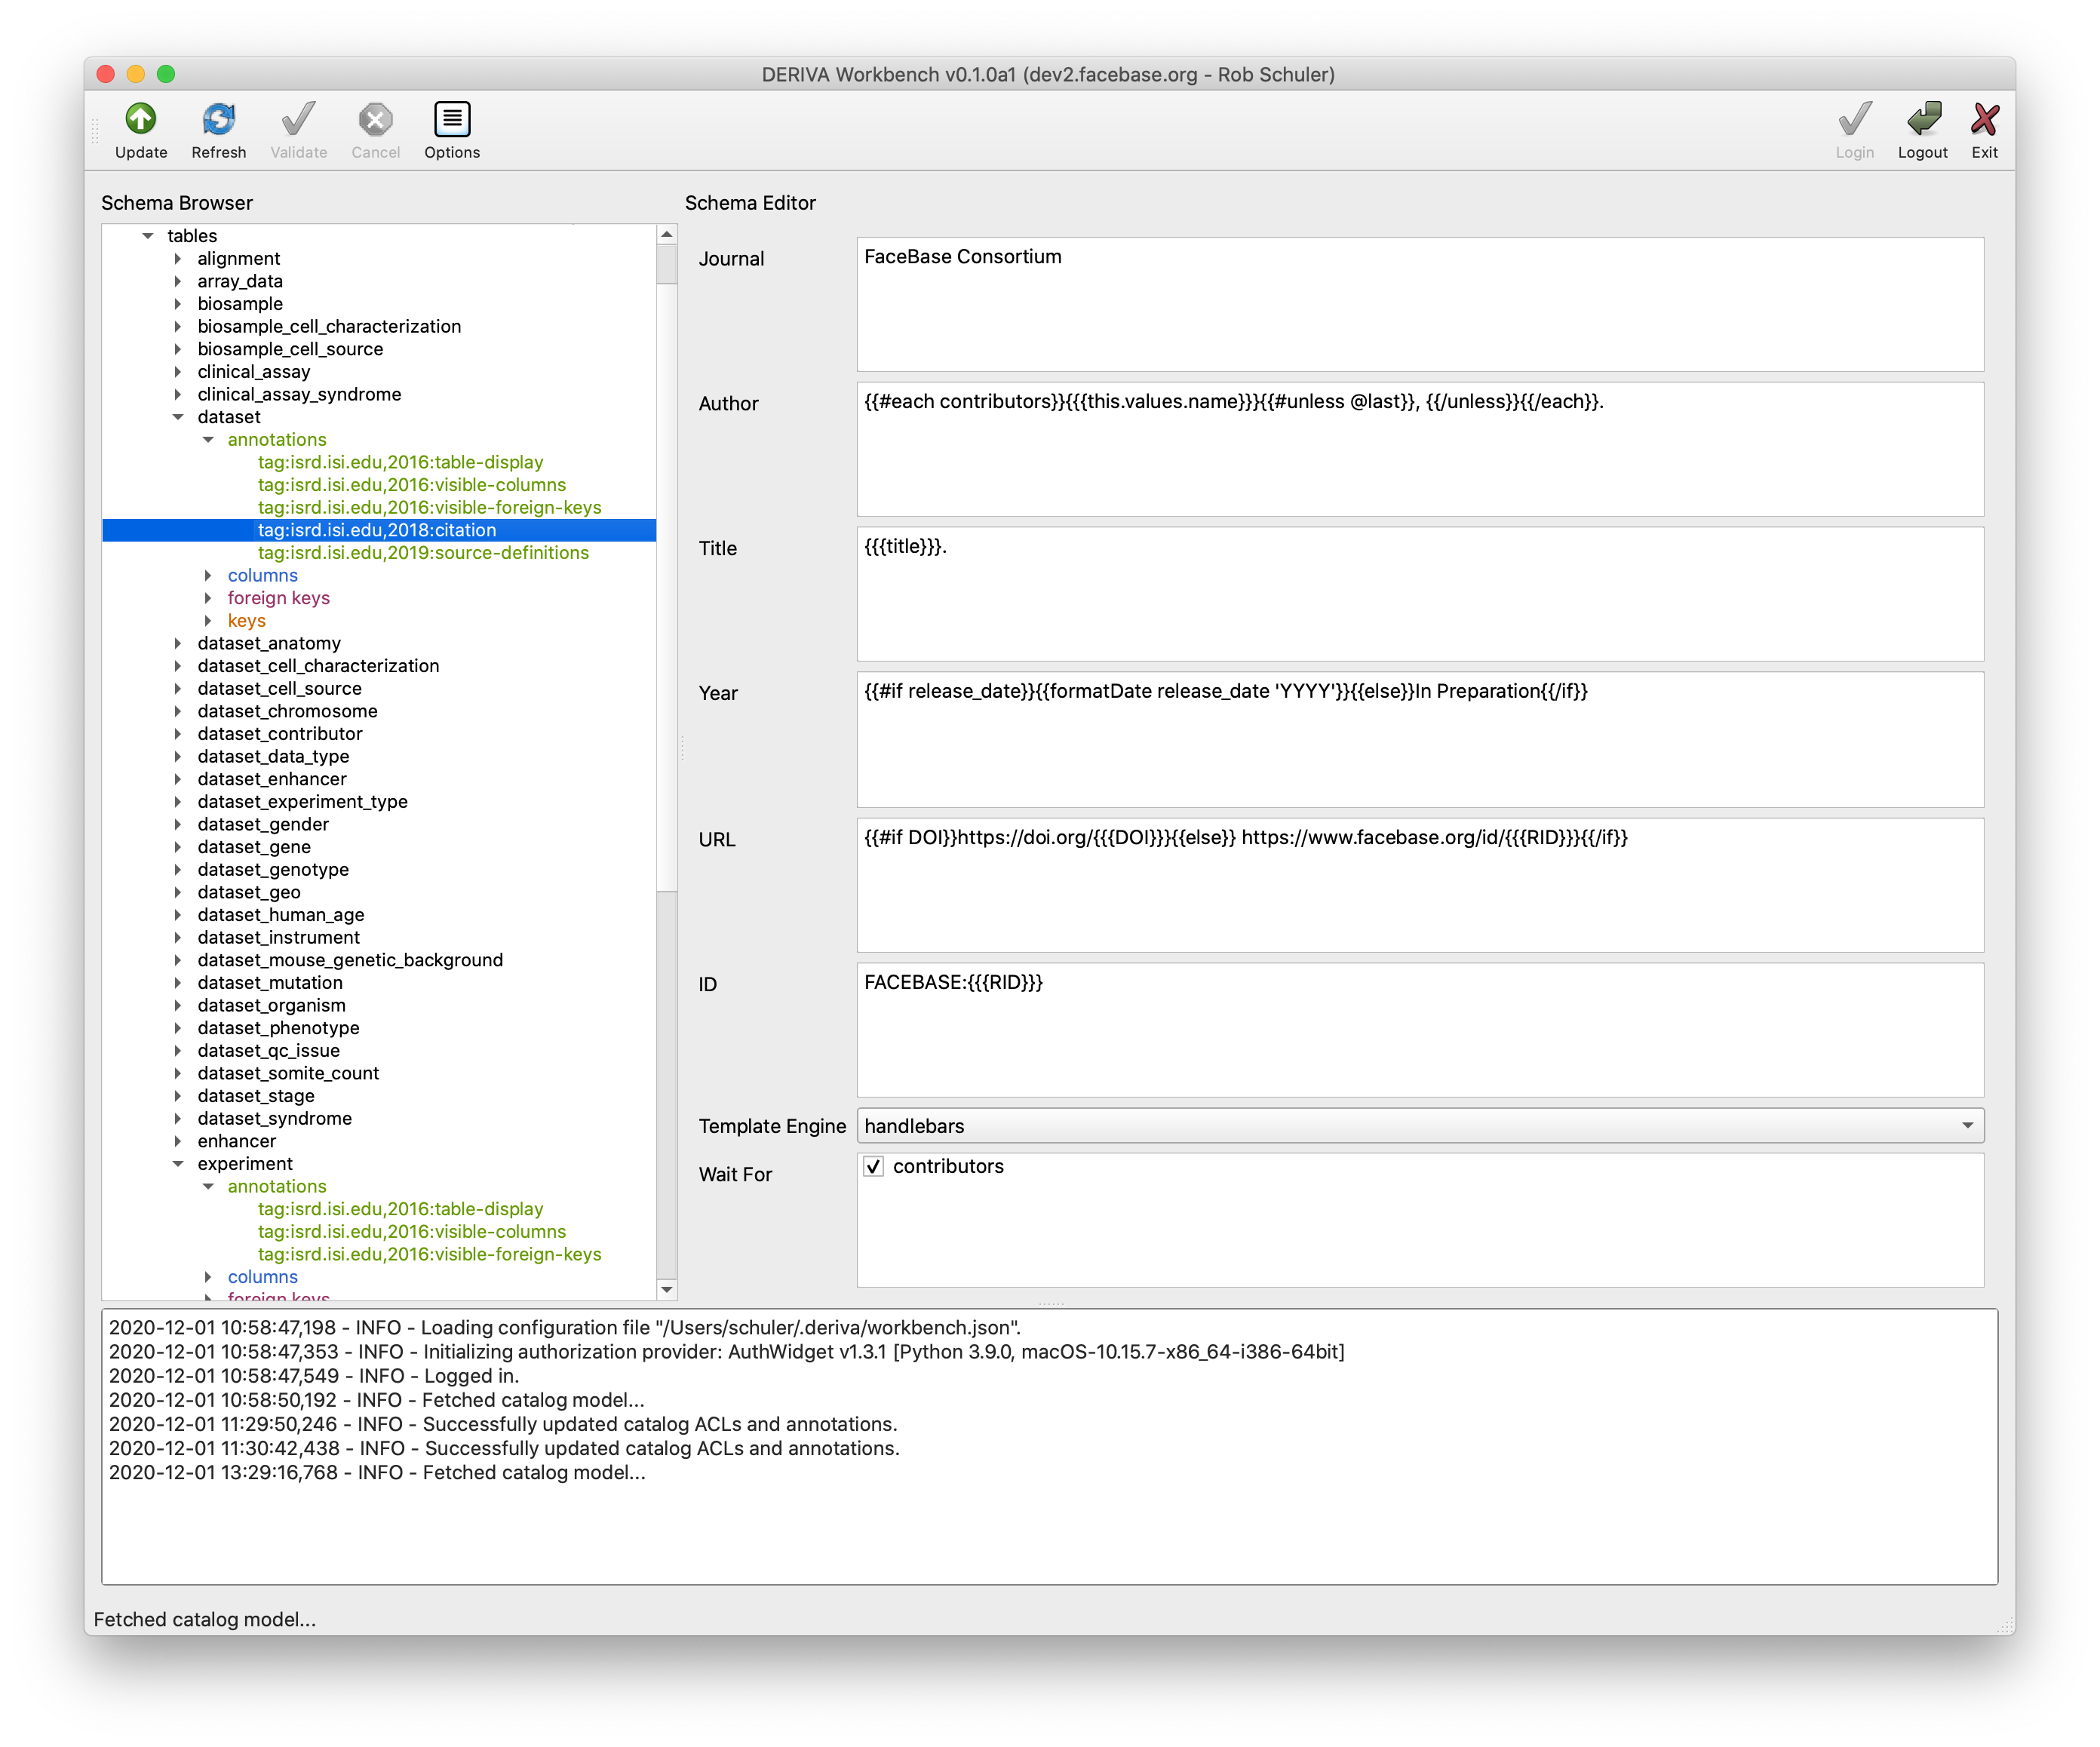
e. Editing citation
The citation editor allows entry of markdown patterns, selection of template engine, and the
optional sources to “Wait For” at bottom.
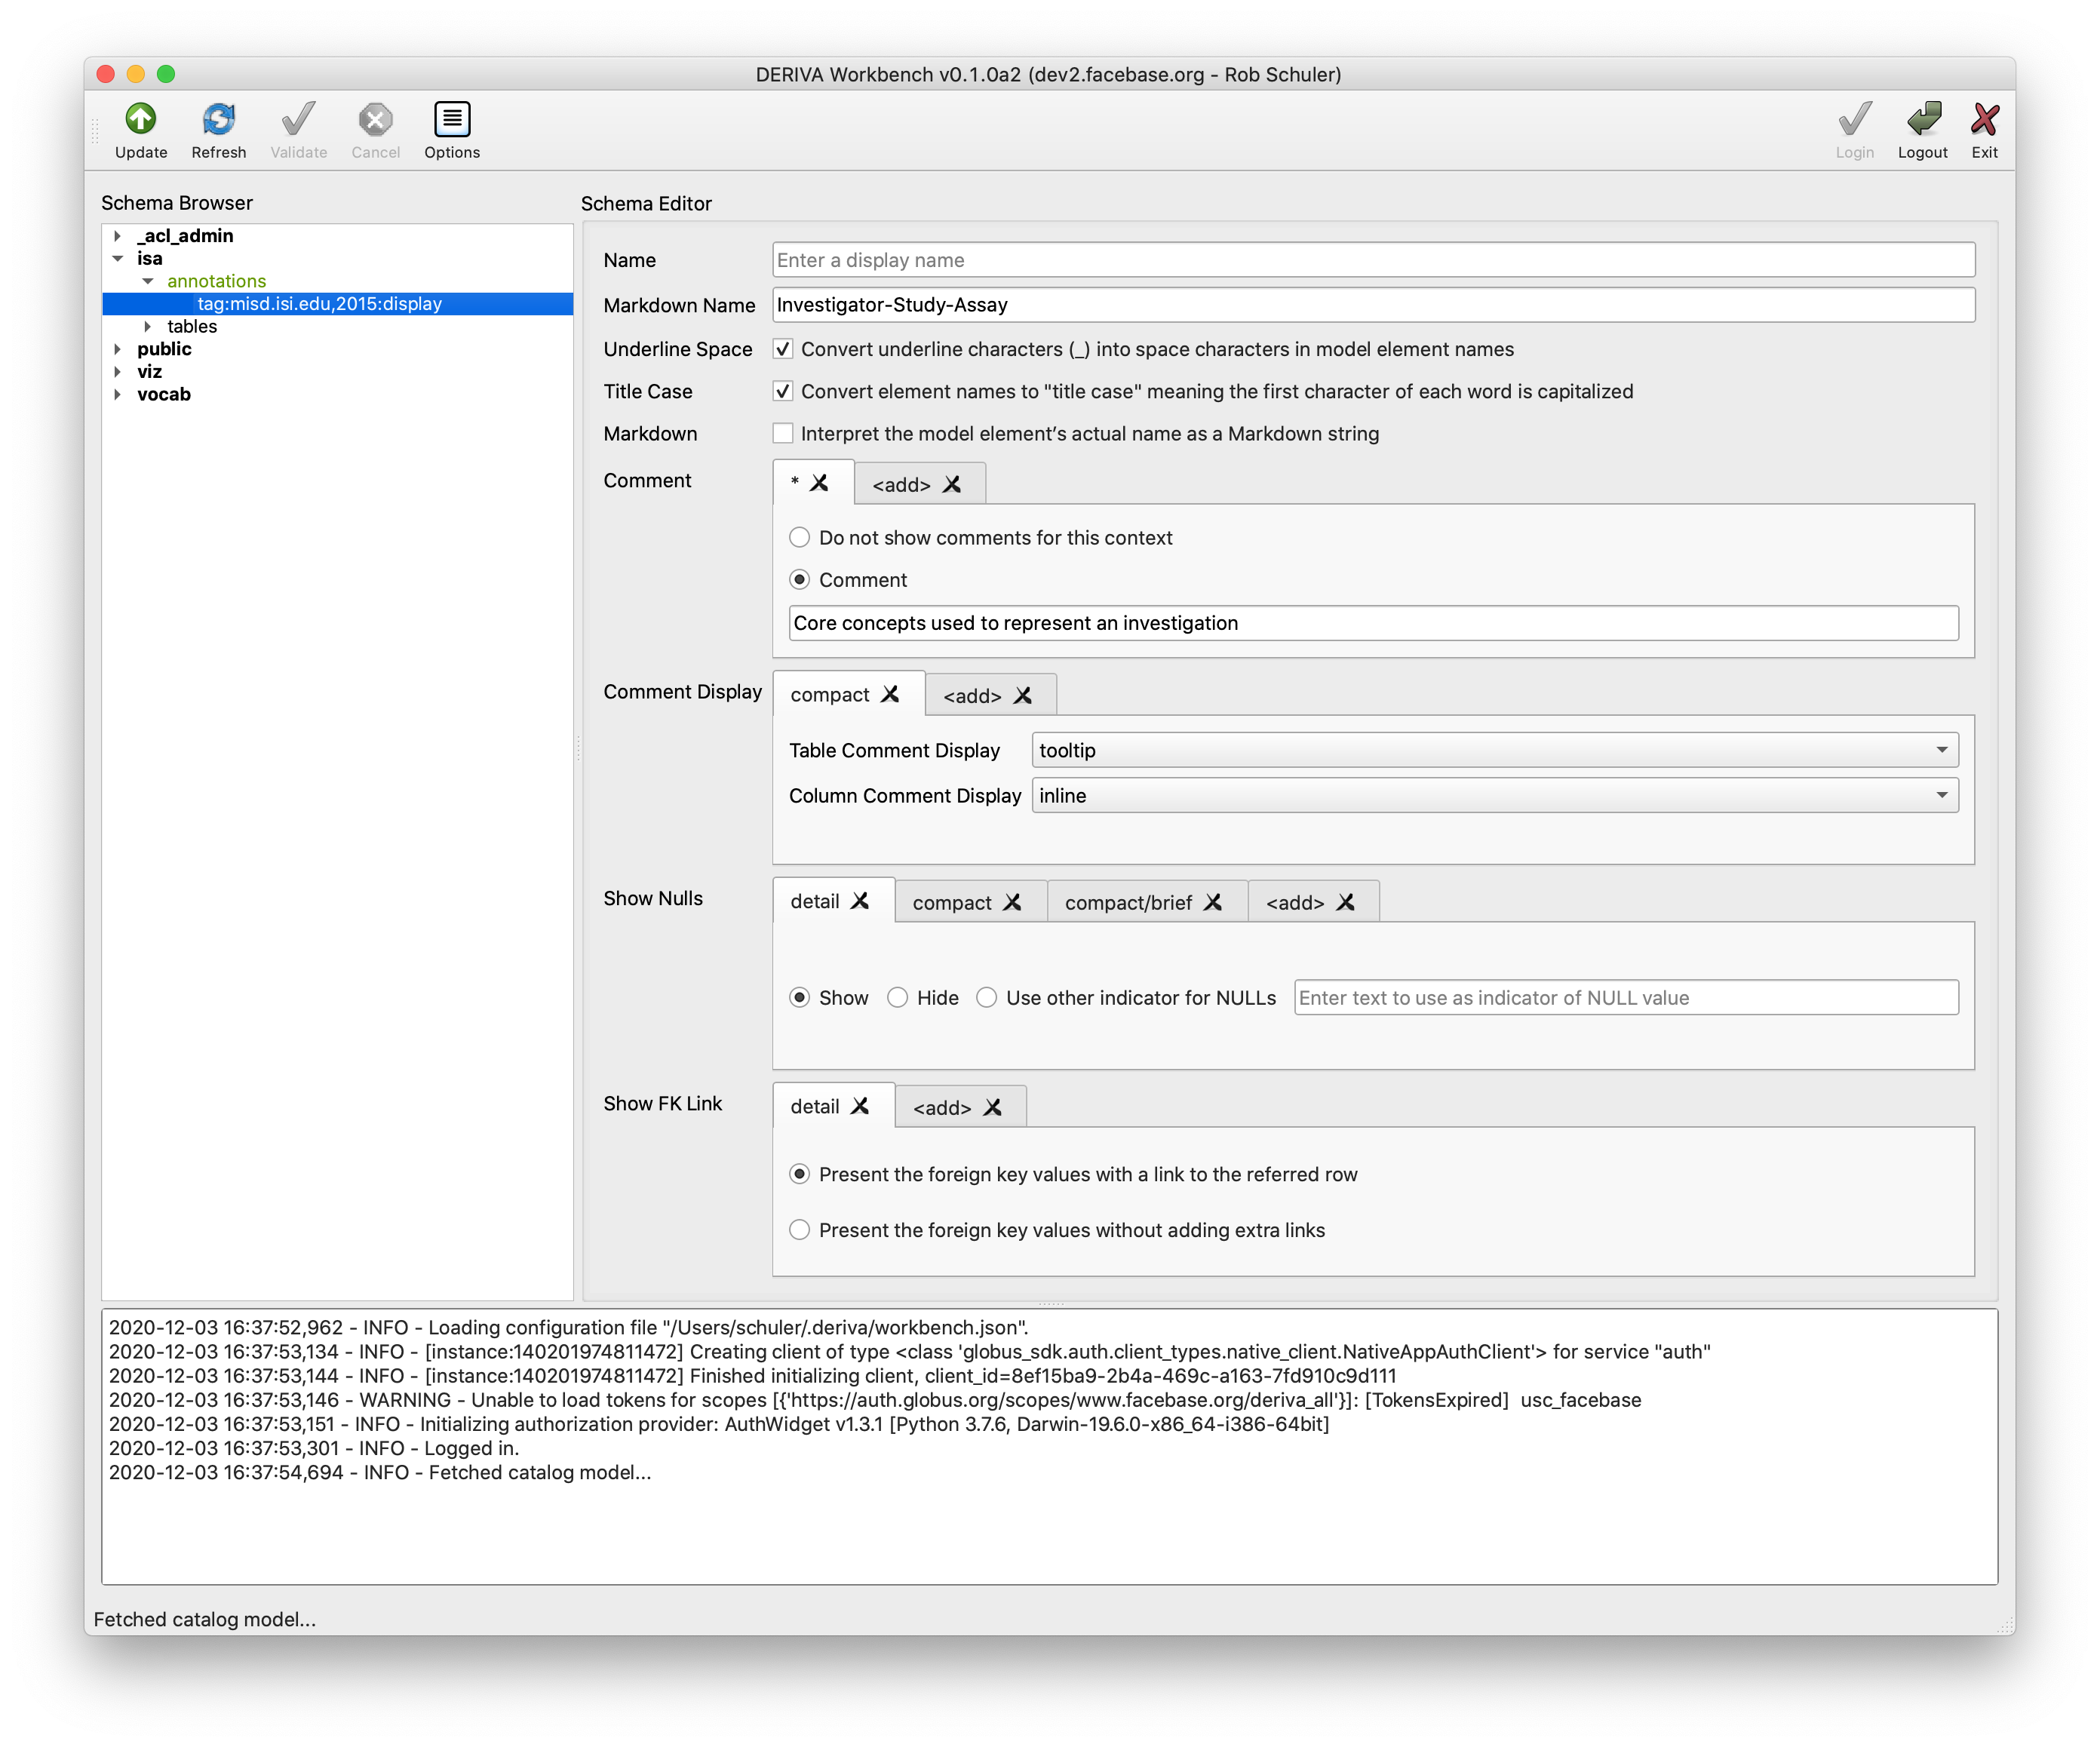
f. Editing display
The display editor allows entry of display names, display modifiers, comments, null handling
directives, and foriegn key presentation instructions.
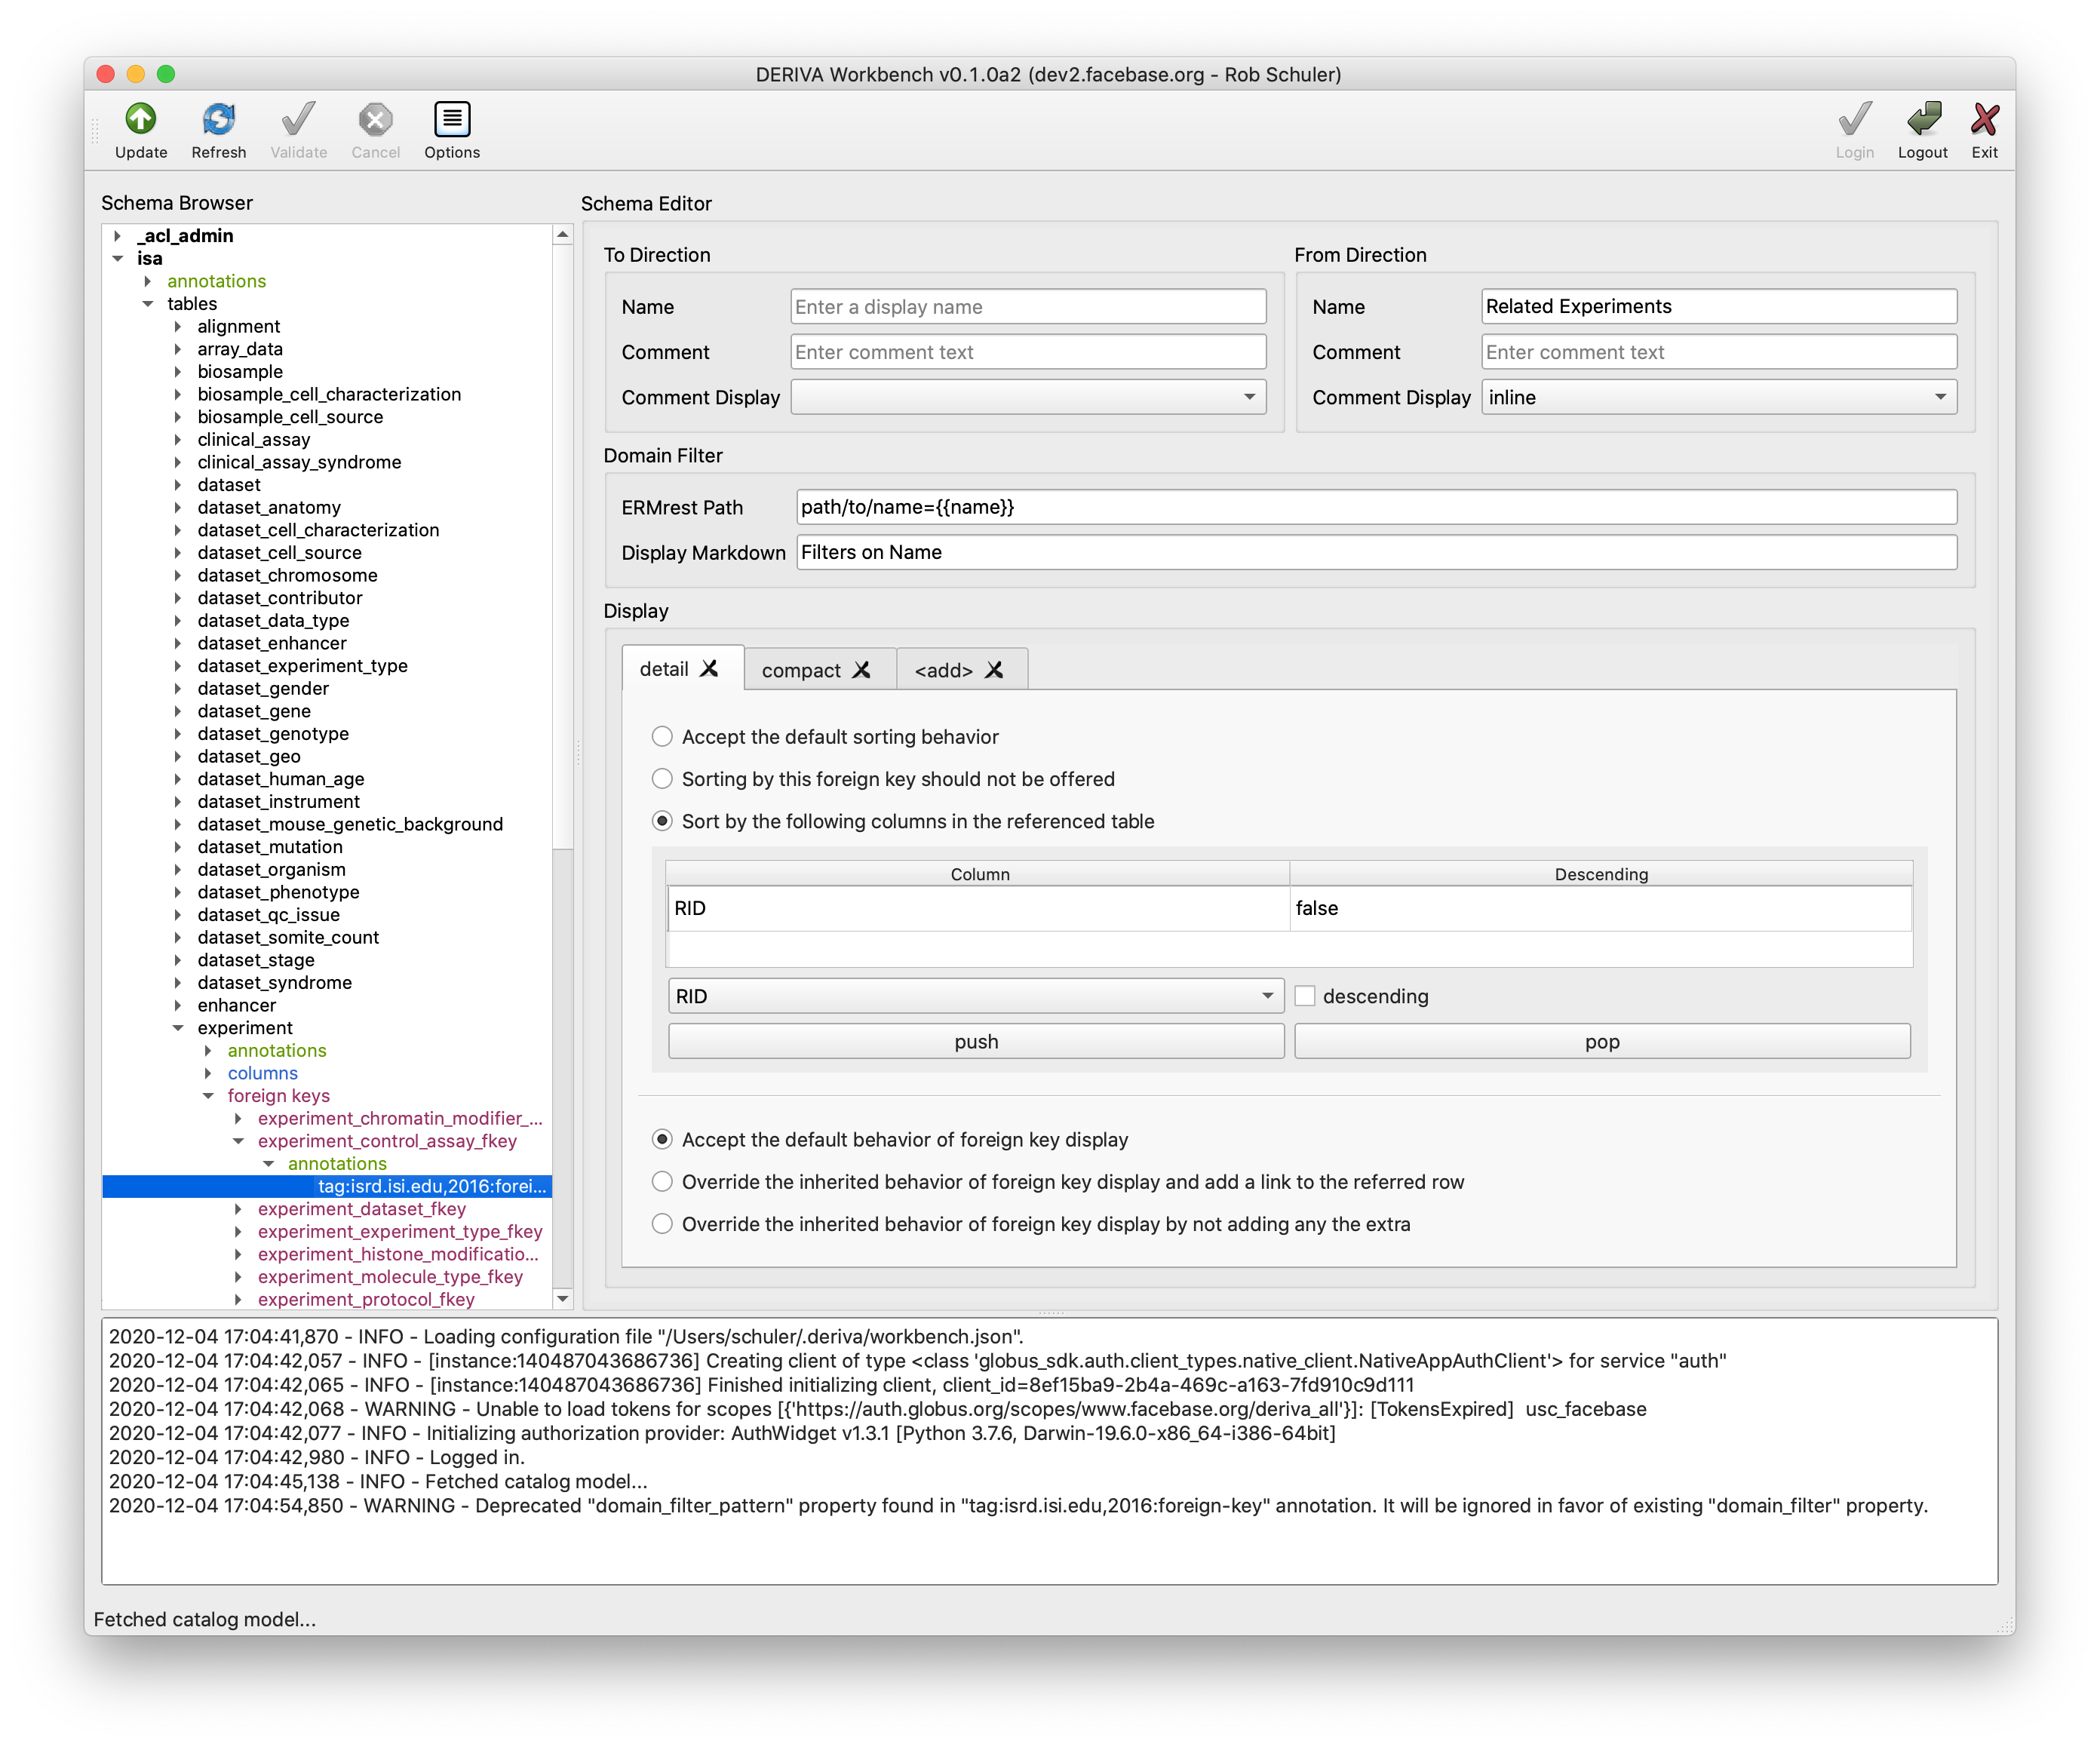
g. Editing foreign-key
The foreign-key annotation editor allows entry of to and from direction names and
comments, the domain_filter property, and the contextualized display property that allows
modiviation of the sorting and link display behavior. The editor will update the deprecated
domain_filter_pattern property to the current format.
6. Adding or Removing Annotations (Graphically)
You may also add or remove annotations in the Schema Browser window using each annotation item’s context menu (typically, right-clicking on the item).
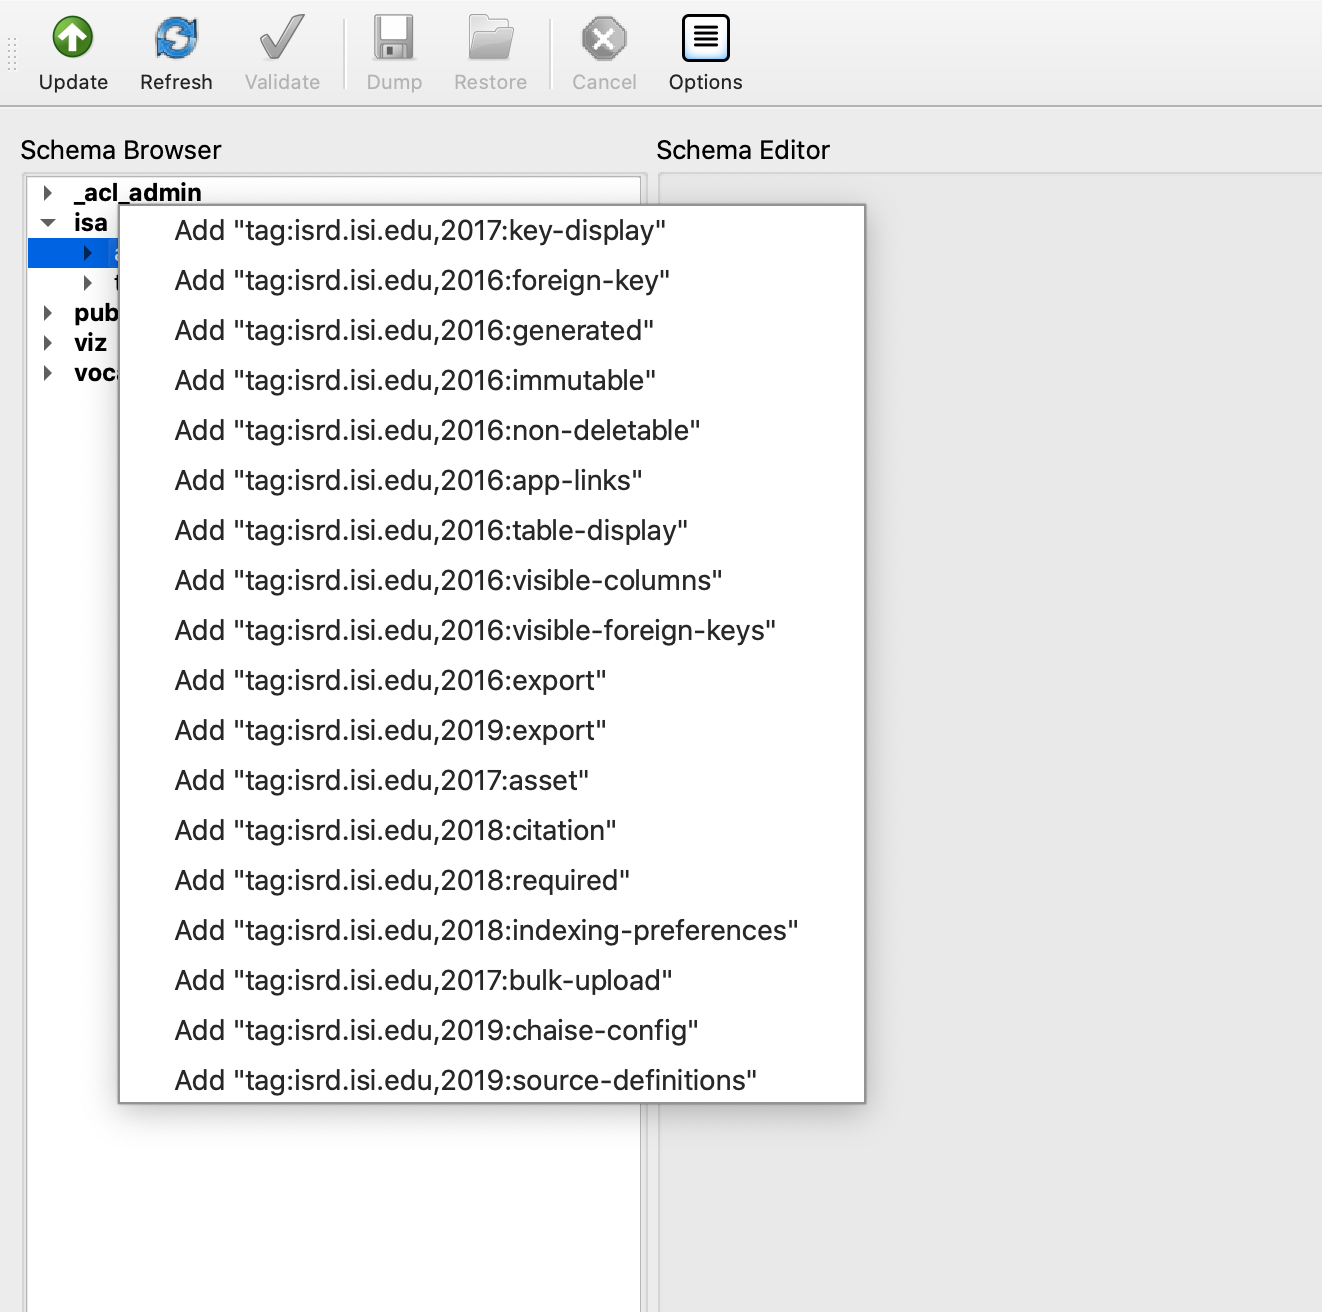
To add an annotation, go to the context menu for the annotations item for any model
object (i.e., schema, table, column, key, foreign key). Select the “Add …” menu item for the
desired annotation. Note that not all available annotations are applicable to all model objects.
Please review the DERIVA Annotation Guide.
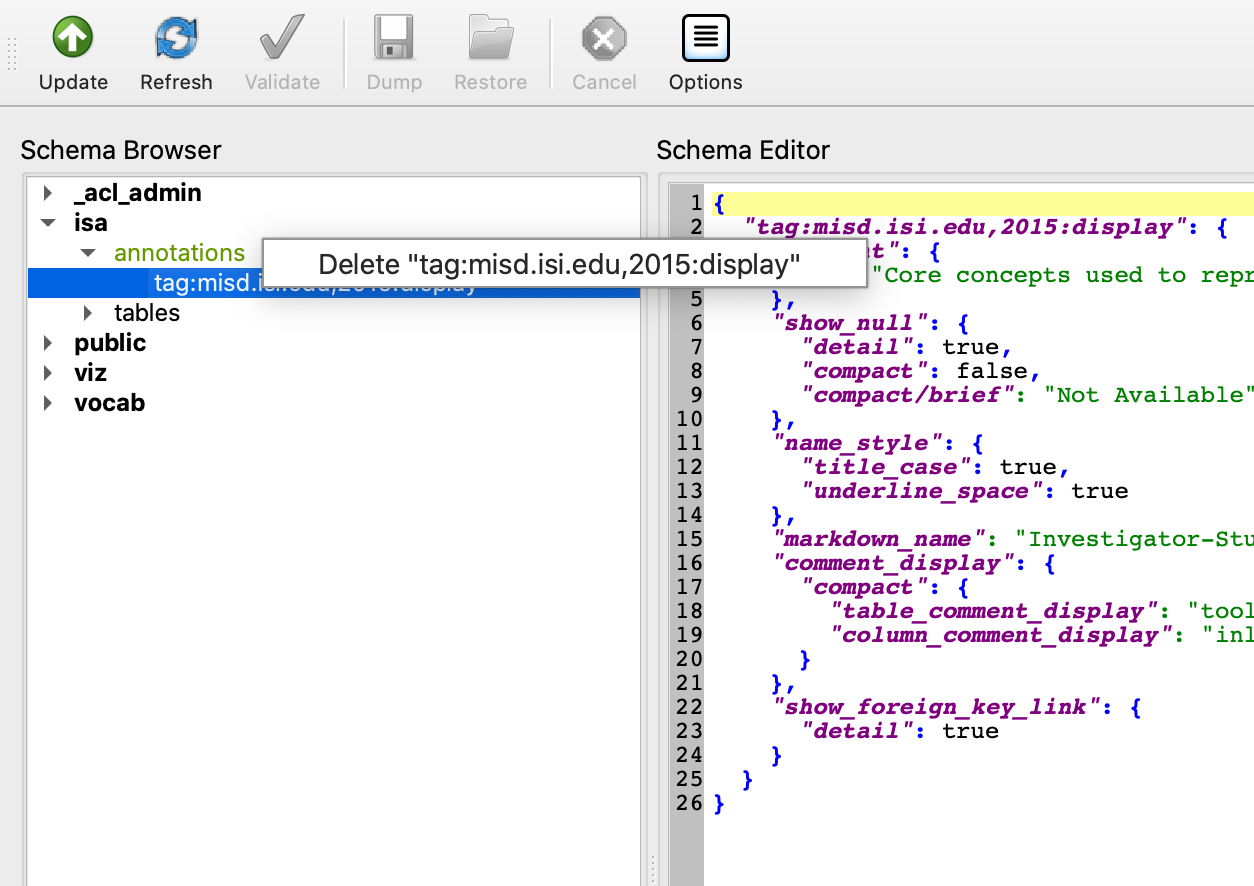
To remove an annotation, open the context menu for the specific annotation by its tag:...
item label in the schema browser. You will be asked to confirm before removing.
7. Updating Server-side Annotations
You may make any number of changes to annotations using the graphical editors or the JSON editor.
Changes will only be updated on the server by pressing the Update toolbar button found in the
upper left hand side of the workbench.
Confirmation or errors will be reported in the log display panel at the bottom of the window.
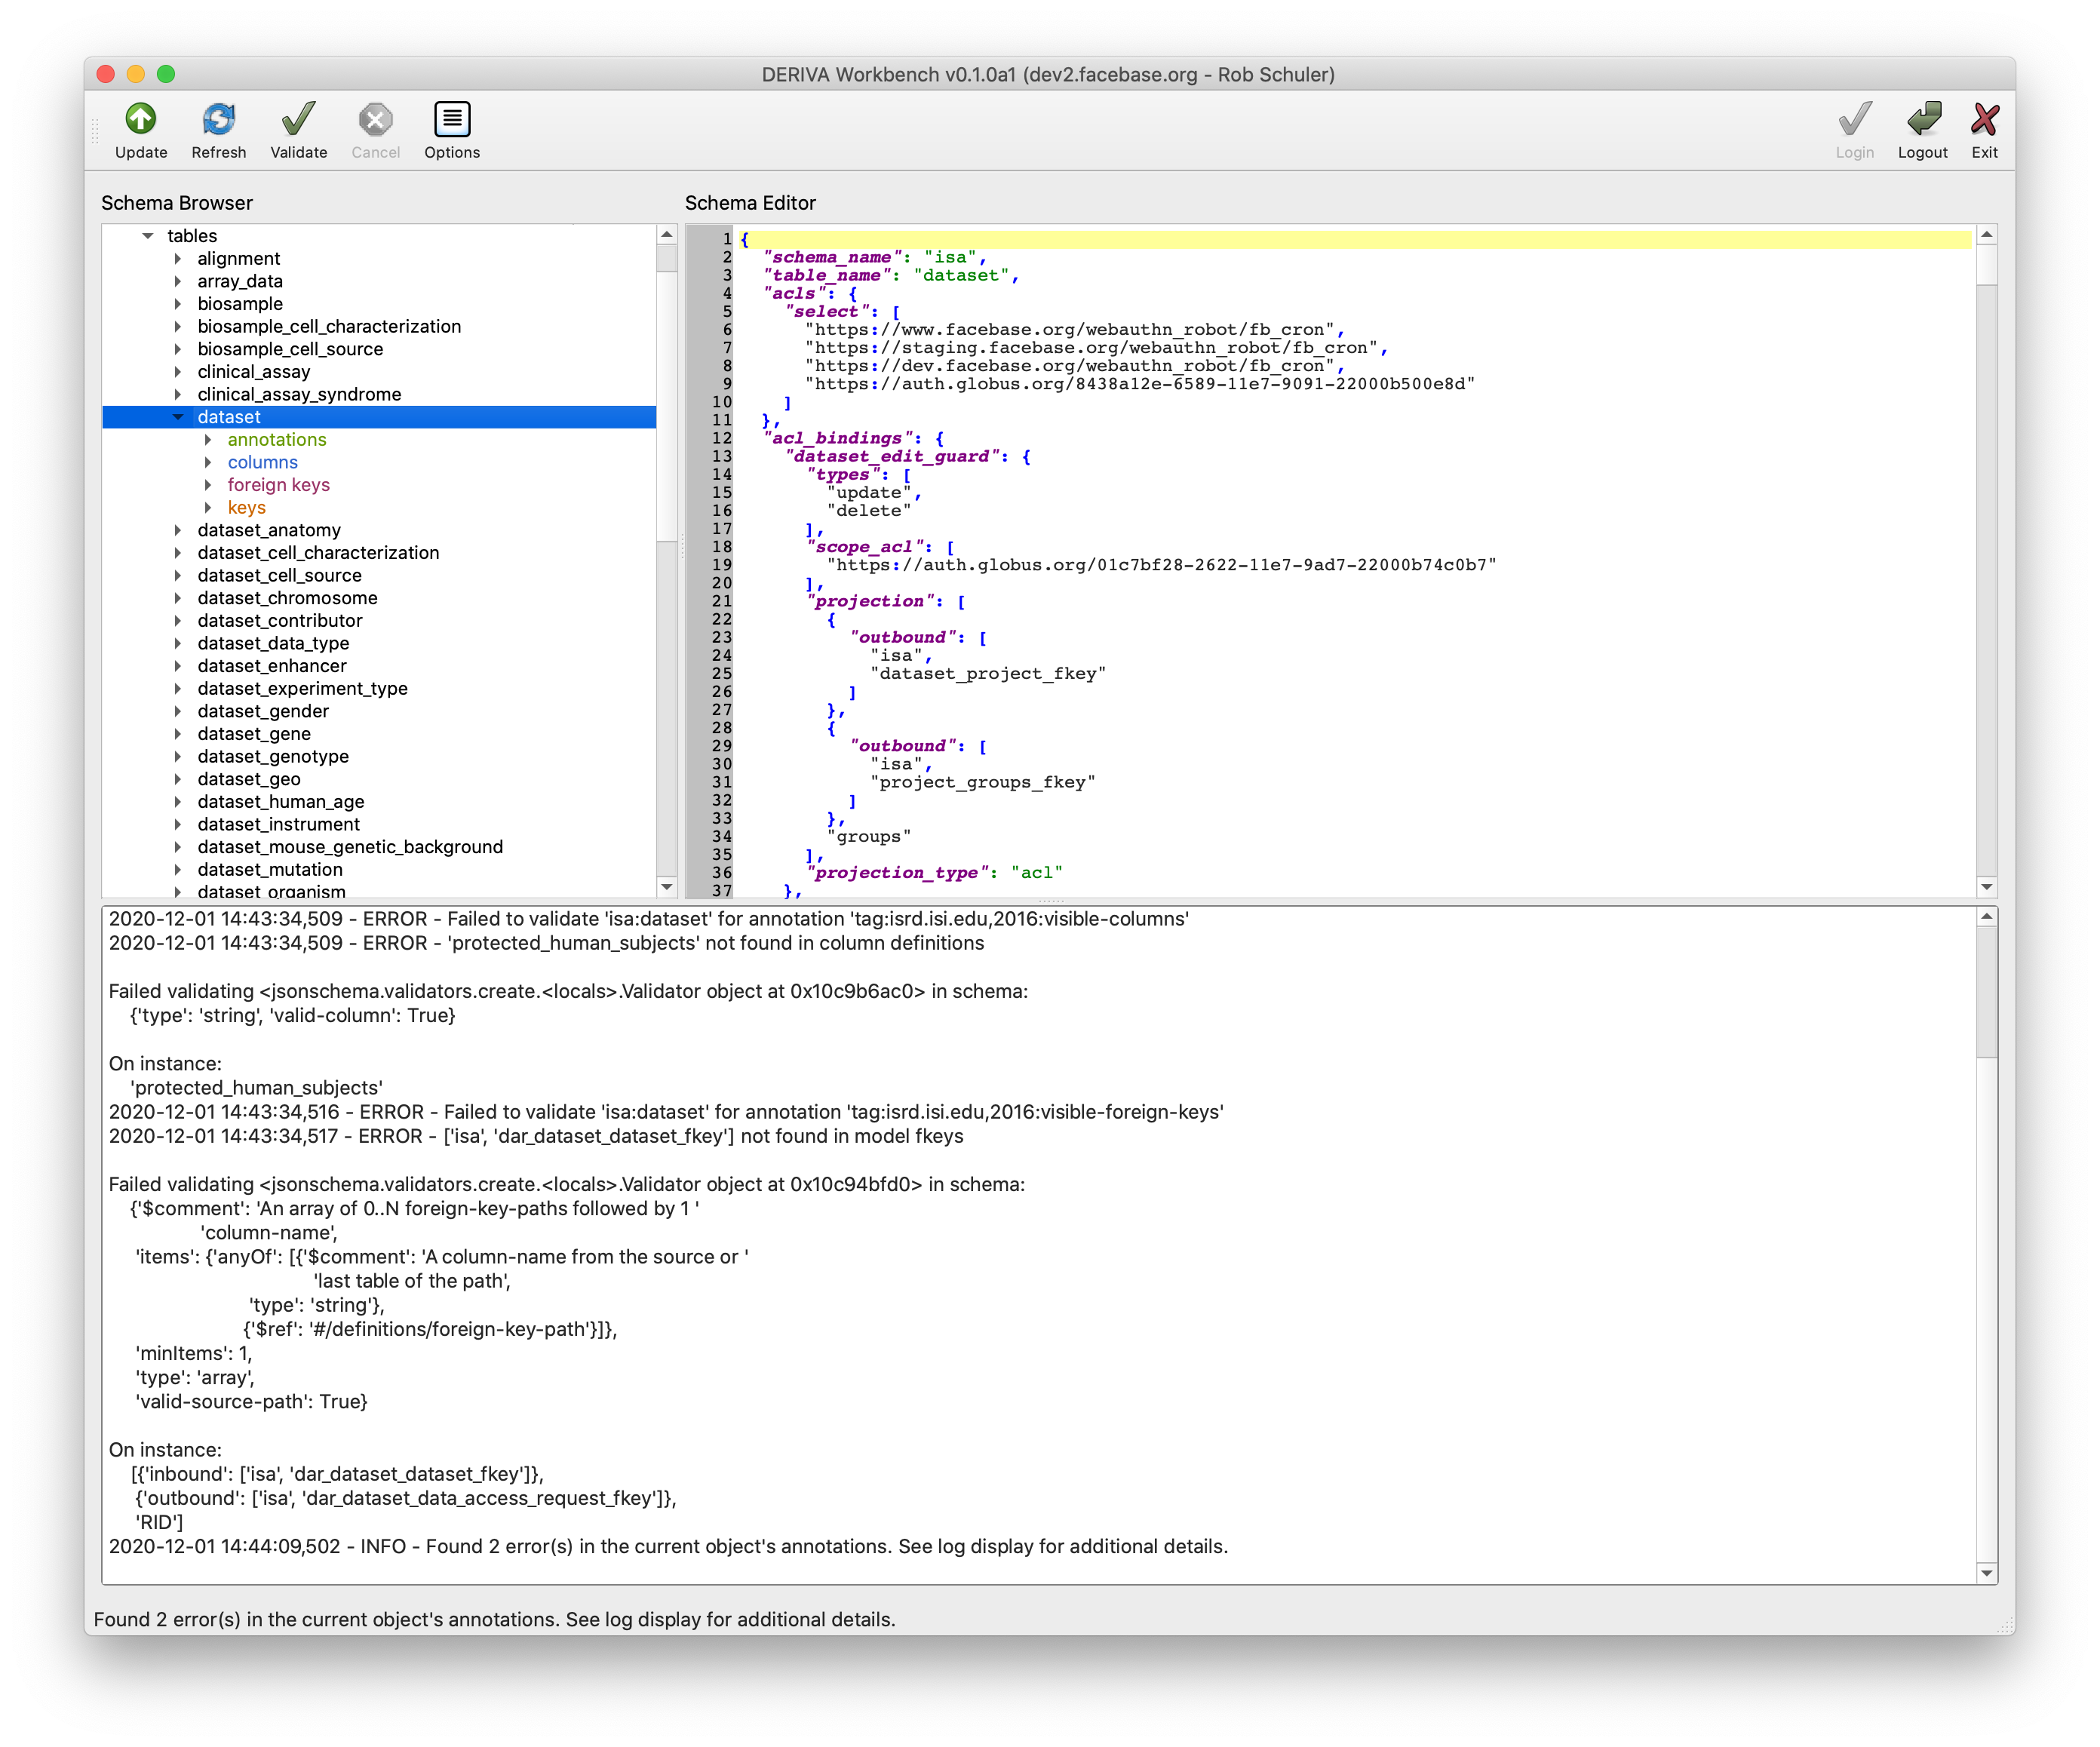
8. Validating Catalog Annotations
You may validate annotations of any model object in the catalog. First, you must select a model
object that contains an annotation resource (don’t select the annotations themselves but the
schema, table, column, foreign key, etc. that contains them). Then click the “Validate” button in
the toolbar.
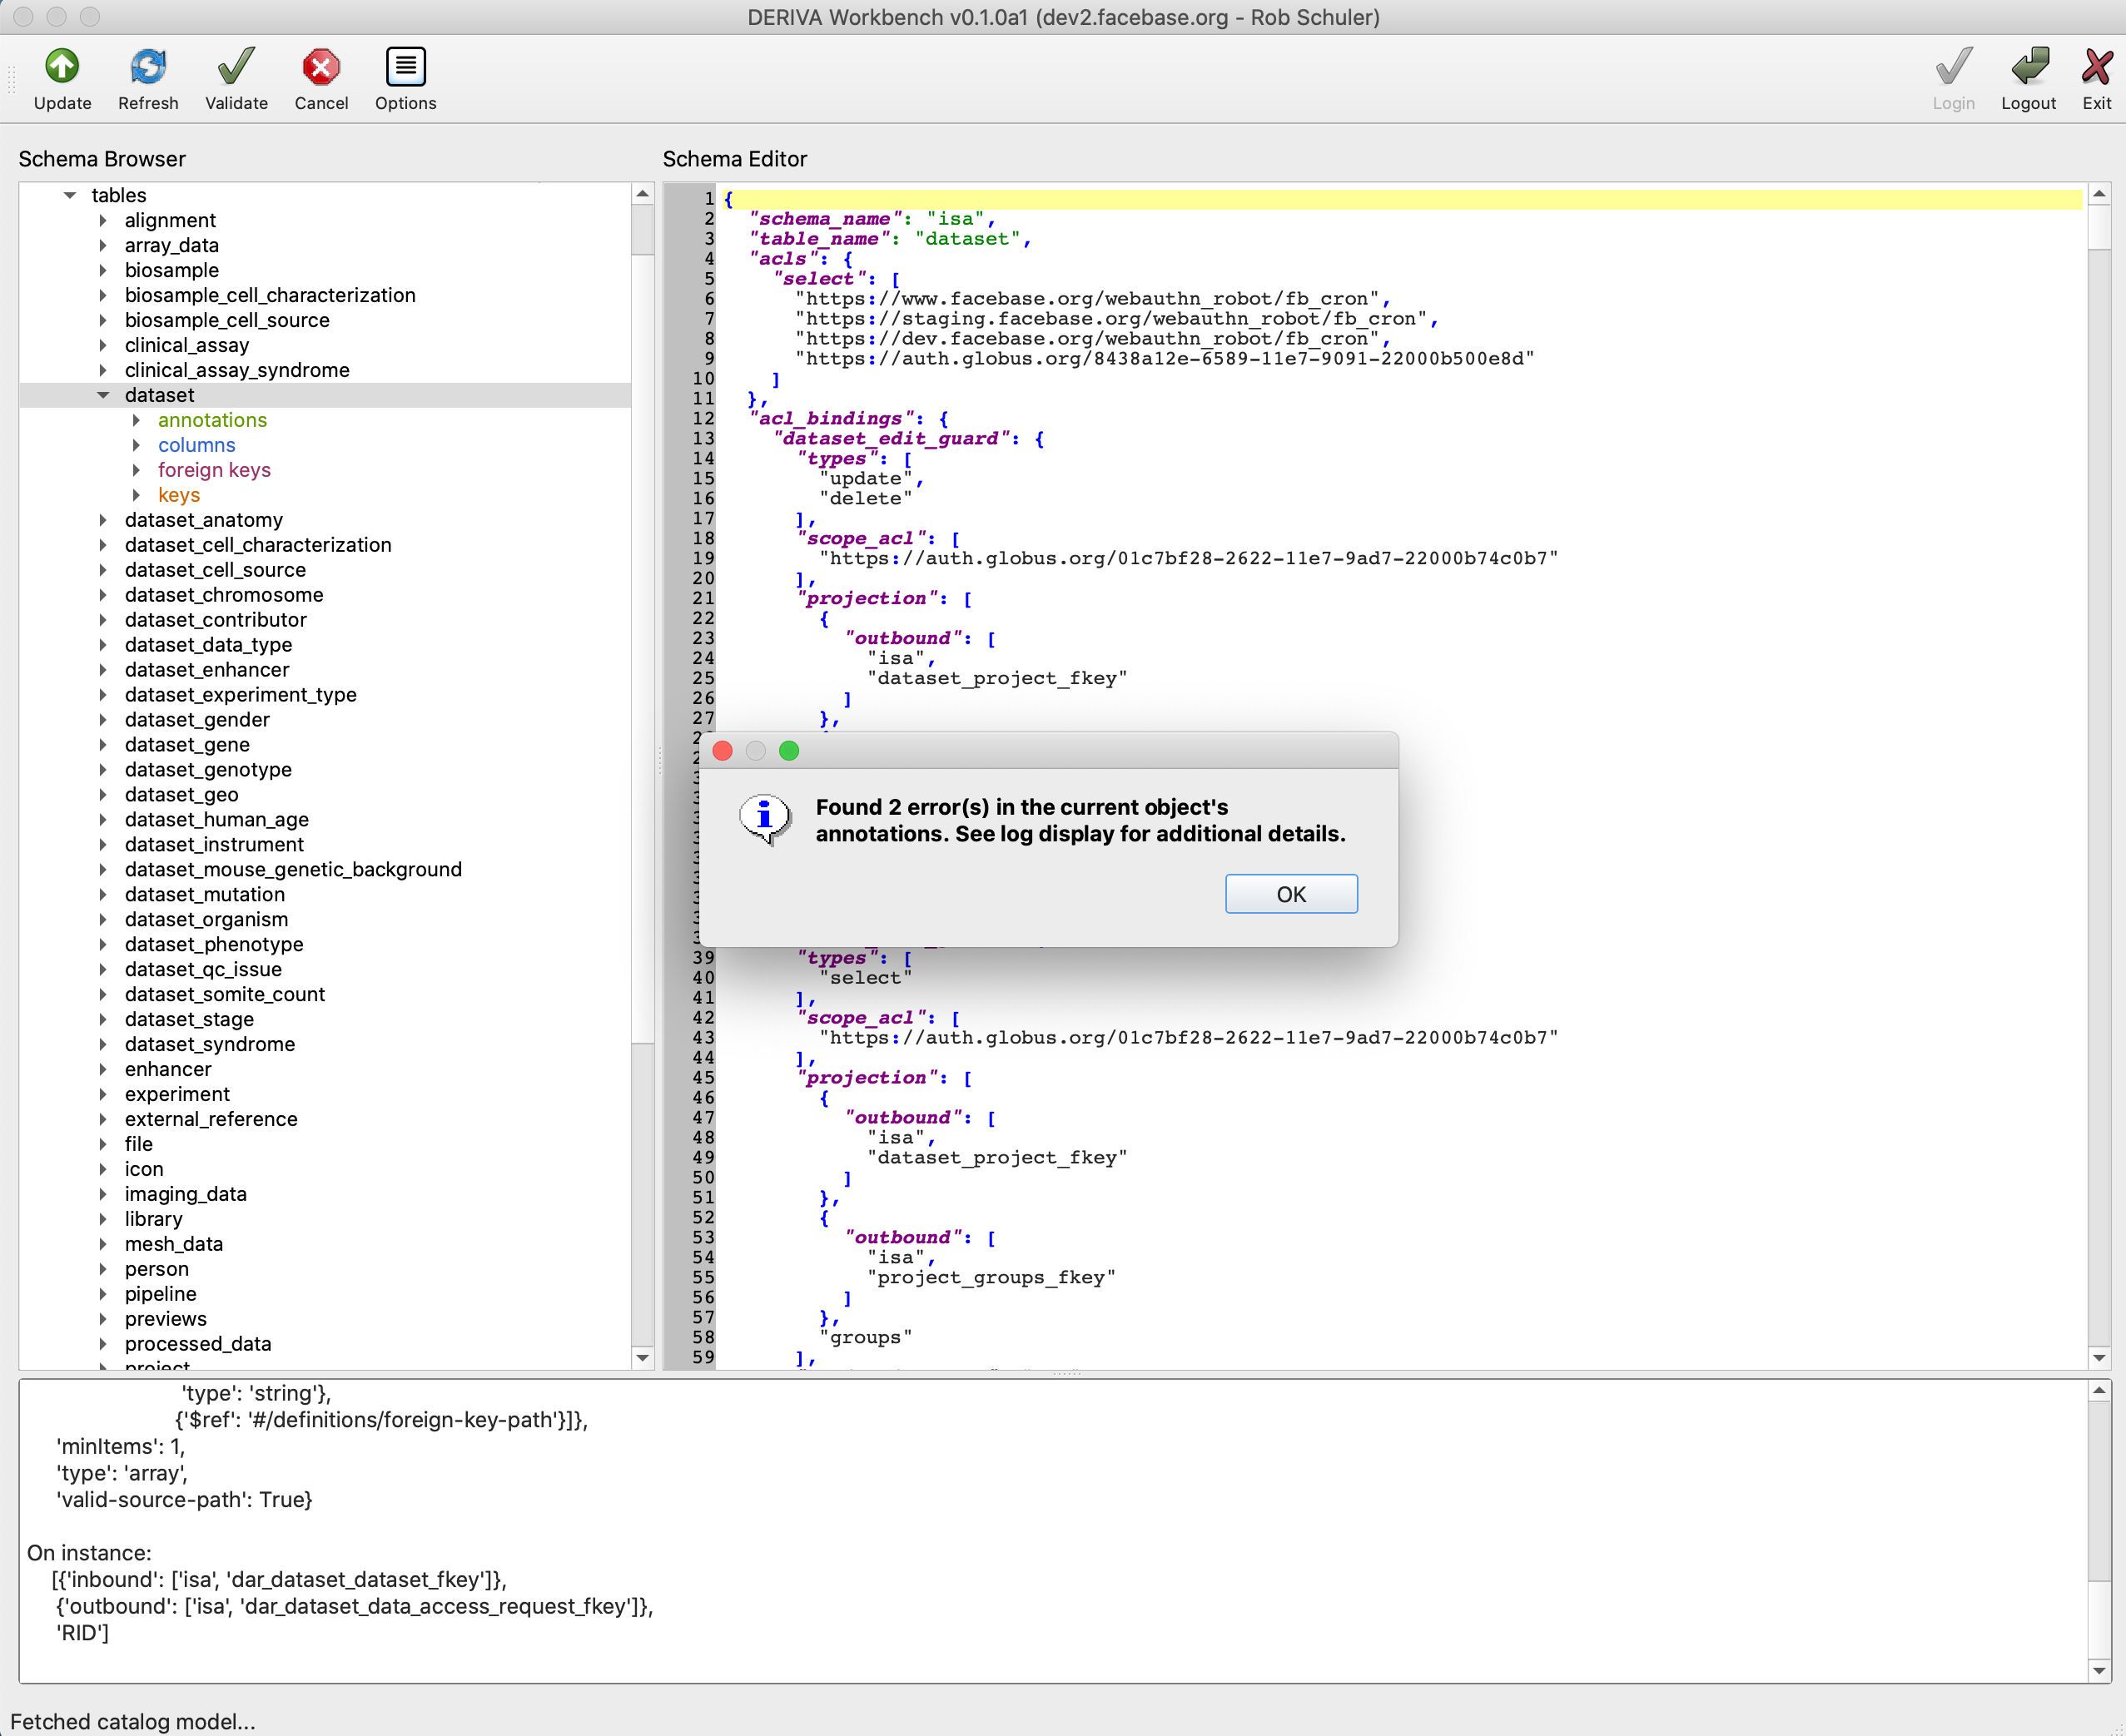
An initial dialog will indicate the count of errors found (above). To see the complete details, see the log display at the bottom of the application window (below). You can drag the log panel for better viewing.
9. Refresh From Server and Discard Local Changes
At any time, you may refresh the local copy of the catalog model, and potentially discard any changes that have not been updated on the remote server. To do so, use the “Refresh” button toward the left in the toolbar.
10. Dump and Restore Annotations To/From Files
You may dump and restore annotations to and from the local file system for any model object in
the catalog. First, you must select a model object that contains an annotation resource.
Then click on “Dump” to dump the annotations recursively to the “Dump and Restore Directory” configured for the server connection. Click on “Restore” to restore the annotations recursively from the configured directory. If a dump file is not found for a given model object in the hierarchy, that object will simply be skipped and an error message logged to the log window.
The directory hierarchy will resemble the structure seen in the Schema Browser window. Even if
you select a single table, column, etc., the annotations will be saved in a directory structure
according to the schema structure. Also, any non-word characters (aside from a-zA-Z0-9_) in the
model element names will be replaced with _ characters. For example, % This Name! will be
converted to __This_Name_. (Limitation: currently, name collisions are possible if you have
model elements that only differ in non-word characters.)